Blog

Thinking About Going Gluten-Free/Casein Free? {Giveaway}

Perhaps you’ve been eating real food for a while now, and yet somehow things are not feeling quite right still. This was the case with KerryAnn at Cooking TF when she dealt with several serious health problems while faithfully consuming a REAL food diet. Though she loathed the thought of having a digestive disorder and giving up certain foods, she couldn’t help but wonder if giving up gluten could help her regain her health.

Thankfully, after a long battle KerryAnn has completely regained her health and the health of her children by figuring out their allergies and going through the long process of healing. They still consume a traditional diet in the style of Weston A. Price, only they avoid gluten and dairy.

Recently, we have had to deal with a similar scenario in our own house. My husband had been eating a traditional REAL foods diet for a while and had already seen benefits with weight loss and some fatigue, but some health issues seemed to linger anyhow. He always felt as though he were in a fog, couldn’t think clearly, had pain and numbness in his hands and feet, had trouble taking full breaths and was always tired. Come to find out, my husband is gluten intolerant and many years of unbridled gluten consuming has set off a chain reaction of other symptoms and underlying deficiencies.

KerryAnn has put together a clearly outlined approach for becoming gluten-free or dairy-free (or both) while still consuming REAL foods in the Cooking Traditional Foods GF and CF eCourse. This course has been the support and guidance we needed to make sure my husband is on the sure path to healing. I am so thankful she has put together this comprehensive course to make the journey easier on us and others.

Get sneak peek of the course by watching this complementary overview video which discusses where to find gluten and its (often secret) ingredient names from the Gluten-Free, Casein-Free eCourse.

This course will be helpful to those who are just starting out with Gluten-free, Casein-free or those who are feeling overwhelmed and need a little extra guidance and support.

What Do You Get?

The GFCF eCourse consists of  85 videos, 18 Menu Mailers and 11 eBooks all chock full of helpful hits, tips and strategies.  Your membership includes permanent access to all of the materials. As long as Cooking TF is around, you will be able to access the class.

Enter the giveaway below for a chance to win membership to this eCourse. If you don’t win or just want to get started now, you can use coupon code EATNOURISHING for 15% off the regular cost of $149. That makes it only $119. KerryAnn has even included the option to break the enrollment cost into three payments. Note: coupon code only applies to the first payment if you go with the payment plan.

WINNER: Entry #449, Ida Koller! Congratulations! Thanks to all who entered!
a Rafflecopter giveaway

What’s the Difference Between Gold Label and Green Label Tropical Traditions Virgin Coconut Oil? {Review & Giveaway}

Coconut oil is the number one oil we use in our home. We don’t just use it for cooking either. Oh no! There are literally over a hundred uses for the stuff. We consume it daily by the spoonful, use it in our baking and cooking, rub it on as a moisturizer, use it as a hair treatment and even make candy with it, like this Raw Peppermint Coconut Oil Fudge.


Tropical Traditions Weekly Sales

Tropical Traditions is our favorite brand of coconut oil because they carefully source out the oil and support small family producers in the Philippines where it is imported from. Not only this, but the quality and taste of their Virgin Coconut Oils is uncompromisable.

The trouble is that Tropical Traditions offers several varieties of quality coconut oil and it can often be confusing to the consumer. There is their Gold Label Virgin Coconut Oil, the Green Label Virgin Coconut Oil, the Organic Expeller Pressed Coconut Oil and the Non-Certified Expeller Pressed Coconut Oil. So what are the differences?

Before we discuss the differences, let’s take a look at the similarities:

  • All of Tropical Traditions’ coconut oils are Non-GMO
  • All of Tropical Traditions’ coconut oils are not hydrogenated and contain zero grams of trans fat
  • All of Tropical Traditions’ coconut oils are processed without the use of chemical solvents (a common factor in some coconut oil brands for deodorizing)
  • All of Tropical Traditions’ coconut oils are high in Lauric acid

Basic Differences

  • All of the coconut oils are USDA certified organic, except the Non-Certified Expeller Pressed, which is still grown by natural practices
  • All of the coconut oils are machine-made at a central location, except the Gold Label Virgin Coconut Oil which is Hand-Made the traditional wet-mill way, using the pure coconut water from inside to extract the coconut oil, which produces less yield. Recent studies show that the hand-made coconut oil contains the most anti-oxidents.
  • The green label and gold label virgin oils are made from fresh, high-quality coconuts, whereas the Expeller pressed are not made with fresh coconuts.
  • The green label and gold label virgin oils are both unrefined. The Expeller pressed oil has been refined, mostly to remove the smell and taste of coconuts. The Green and Gold label virgin coconut oils still have the flavor and smell of coconuts intact.

Is there really any difference between the Green Label and Gold Label Oils?

Yes! They are both very high quality, but the main difference is in how they are made. The Green label is machine made in large volumes using the quick-dry method of cold pressing the oil out of dried coconut, which results in a higher yield. The Gold label is produced in smaller batches by families using the wet-milling method, which produces a lower yield, but higher anti-oxidants.

My family has been purchasing the Green Label Virgin Coconut Oil for years. I had never had the opportunity to try the Gold Label oil until Tropical Traditions sent me some to review.

On a side-by-side taste test by spoon here are some of my observations:

  • The Gold label oil has a stronger, more distinct coconut flavor (though this can vary from batch to batch according to Tropical Traditions), whereas the Green label oil has a more mild coconut flavor.
  • The Gold label oil has a stronger aroma of coconuts than the Green label oil.
  • The Gold label oil is more delicate on the tongue and has a more velvety mouth-feel. It seems thinner and I believe it may have a slightly lower melting point than the Green label oil.

I also made a batch of some of my favorite homemade coconut butter using a little bit of the Gold Label oil in place of the Green label I usually use. The taste and texture were both different than usual. The coconut butter tasted more coco-nutty and the texture was finer. I also had a bit of separation when it cooled, which doesn’t usually happen, and some of the oil rose to the surface. The flavor was really nice though. I imagine that this oil would also be really nice in this Chocolate Coconut Bark.

For baking purposes, Tropical Traditions says that both kinds of oils should mostly lose their coconut flavor when baked with. I didn’t have the opportunity to test the Gold label for baking, but I do know that I love to bake with my Green Label coconut oil and often replace the butter that is called for in recipes with it. I have not noticed my baked goods having any coconut flavor really.

I also used some of the Gold label to make my favorite moisturizing/healing oil that I use daily. It consists of coconut oil, Argan oil and Tamanu Oil. I use it all over and then use the leftovers on my hands to rub into the ends of my hair. I didn’t notice any difference in the consistency or results with this from the Green Label I usually use.

Who Should Purchase Gold Label Virgin Coconut Oil?

  • Those who want to support small family producers. The Gold Label oil is the only oil that is produced by small family businesses in the Philippines using the traditional, by-hand extraction method.
  • Those who want the freshest, highest-quality, small batch oil.
  • Those who consume coconut oil raw and want the highest anti-oxidants. According to recent studies, the Gold label oil has the highest anti-oxidents of all the other oils.

Want to see the difference of the Gold Label Virgin Coconut Oil yourself? Enter the giveaway below using the RaffleCopter widget to win some Gold Label Coconut Oil for yourself!

Win 1 quart of Gold Label Virgin Coconut Oil!

Tropical Traditions is America’s source for coconut oil. Their Gold Label Virgin Coconut Oil is hand crafted in small batches by family producers, and it is the highest quality coconut oil they offer. You can read more about how virgin coconut oil is different from other coconut oils on their website: What is Virgin Coconut Oil?

You can also watch the video they produced about Gold Label Virgin Coconut Oil:

Tropical Traditions also carries other varieties of affordable high quality coconut oil. Visit their website to check on current sales, to learn about the many uses of coconut oil, and to read about all the advantages of buying coconut oil online. Since the FDA does not want us to discuss the health benefits of coconut oil on a page where it is being sold or given away, here is the best website to read about the health benefits of coconut oil.

Disclaimer:Tropical Traditions sent me 2 pint sized jars of their Gold Label Virgin Coconut oil for purposes of this review. I was under no obligation to write a review or to write anything specific, and everything written in the post is completely my own opinion or based off of my research. I was also not obligated to run a product giveaway in return for the free product. If you order by clicking on any of my links and have never ordered from Tropical Traditions in the past, you will receive a free book on Virgin Coconut Oil, and I will receive a discount coupon for referring you.

a Rafflecopter giveaway

Nutritional Differences of Grass-fed Beef and Conventional Beef

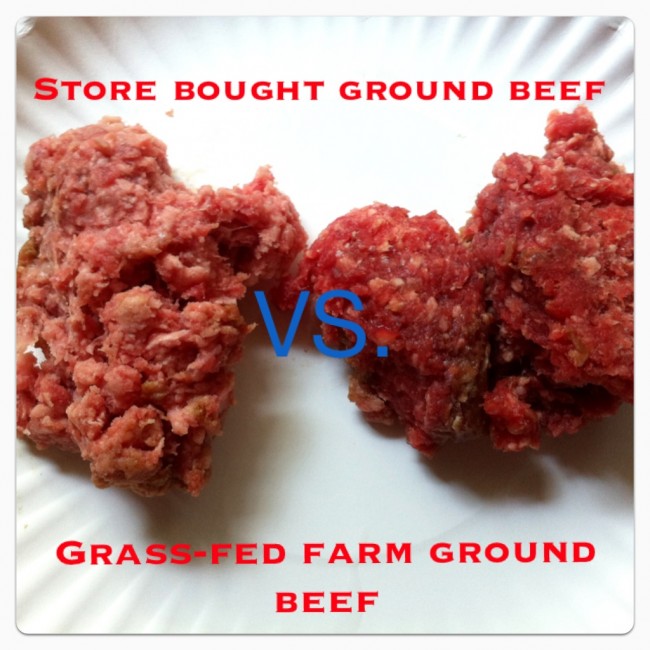
Check out this photo that was snapped with a side-by-side view of ground meat. One is store-bought, conventionally grown beef and the other is from a grass-fed farm purchased beef share. Which is which? What other observations can you make just by sight? Which one would you rather eat?

Without even getting into the economics, environmental aspects and politics of grass-fed beef vs. conventional grain-fed beef, or mentioning the living conditions and what they actually do eat, let us strictly talk nutrition.

Probably one of the most important differences is the ratio between Omega-3 and Omega-6 in each type of meat. These two fats are important to keep in balance in our bodies. Both grain-fed and grass-fed beef have about an equal amount of Omega-6, but with a lack of greenery in the diet conventionally grown meat has next to no Omega-3s, while grass-fed beef has sometimes four times the amount of Omega-3s in conventional beef. If you cannot afford to purchase grass-fed beef, it’s a good idea to supplement your diet with extra fatty types of fish or fish oils to keep proportions in your body in balance.

Studies have also shown that grass-fed meat is 3 to 5 times higher in CLA (conjugated linoleic acid) than grain-fed meat. CLA is thought to be one of the most important cancer defenses and is known as the “good” naturally occurring trans fat.

Besides these two above grass-fed beef is higher in B vitamins, vitamin K, and Vitamin E and trace minerals like selenium, magnesium, and calcium. This vitamin and mineral boost is attributed to the variety of wild forage, grasses and shrubs that a pastured cow munches on, which are grown in good soils that have been organically and sustainably fertilized, resulting in an optimal nutritional profile. We are only really scratching the surface of the health benefits of grass-fed beef here, not to mention the taste difference.

Availability of Grass-fed Beef

It seems easier to acquire conventional grain-fed beef. Simply get in your car and drive to the nearest market. It won’t hurt your wallet too much at an average cost of $3 per pound either. Grass-fed beef is easier to come by than you might realize and, if you’re smart about it, you won’t have to pay upwards of $10 a pound either.

  • Search for a local farmer’s market, CSA, or buying club nearby that offers grass-fed beef. If you contact the farm directly, you can sometimes work out a discount by purchasing in bulk. It may require a bit of research on your part, but a good detective often finds a fantastic source that is within their budget.
  • Wait for grass-fed beef to go on sale at your local markets and stock up! This may seem the most convenient, but you will end up paying more than the other options.
  • Search for and buy direct from a local farm. To save even more, get several friends together and split a whole beef share. This option will save you the most money. Again, there is a research aspect to it and it may require more effort and organization, but it is, in my opinion, the most affordable option for acquiring grass-fed beef.
  • Purchase from a reputable online family farm vendor and have your meat delivered directly to your doorstep. You can’t get more convenient than that! This option offers both convenience and cost effectiveness for the prudent and busy consumer. For the most savings, wait for a sale and purchase in bulk.

In reality, research goes a long way and there are always affordable options. There was a family that thought they would never be able to afford grass-fed beef for everyday consumption, but were looking around for an option to purchase at least some pastured meat. During their research, they found a farmer who would deliver meat locally and would end up costing around $4 per pound for a half beef share. Needless to say, they were surprised to be able to find such a deal. Now all of the beef they consume is grass-fed.

If large shares are not an option to save money, purchasing cheaper cuts of meat such as bones, organ meats, osso bucco, short ribs, ground and shanks will provide your family with all the benefits of pastured meat at a fraction of the price. These cuts make wonderful enzyme rich broths, soups, sauces and other inexpensive meals that will nourish.

It is understandable that many feel as though grass-fed meat is out of their reach and so opt to consume conventional meat. Grass-fed beef raised by farmers who are good stewards of the animals and the land they are raised on is the best option on several levels. Next, grain-fed or mixed fed meat raised by farmers with sustainable and humane practices would be next. After that, store-bought, conventionally raised beef. Bottom line is to purchase the best quality meat you can afford.

What are your experiences with grass-fed beef vs. grain-fed beef?

Photo Credit: arsel

21 Tips to Avoid Plastic for Real Food Kitchen Storage

avoid plastic food storageHave you seen this article about BPA plastic simply being replaced by its cousin BPS?

It seems more important than ever to learn how to keep our kitchens and food as plastic free as possible. The problem is that plastic products have become so convenient and second-nature that many of us don’t have any clue as to how to store our food without it. With that in mind, I came up with this list of 21 ways to avoid plastic when storing food in your real food kitchen. Most are ways to store your food completely plastic free and others are hacks for how to store your food in plastic if it becomes necessarily.

  1. Use mason jars to freeze solid foods like beans, rice, meat, fruits and veggies. Don’t fill to the top to avoid the food touching your reusable lids. After food is frozen solid, add about 1/4″ of water on top of the food to keep more air out.
  2. Freeze meals in food-safe Pyrex dishes without a lid. After food is solid add about 1/4″ of water on top of the food. Place a tight fitting lid, or top first with parchment paper or butcher’s paper and then cover tightly with aluminum foil (you can reuse the aluminum foil many times!).
  3. Wrap breads, waffles, pancakes, muffins and other dry foods carefully with parchment paper or butcher’s paper (trying to get as much air as possible out) and tape closed with freezer tape. Then wrap tightly in aluminum foil to keep air out (you can reuse the aluminum foil many times!). Do not use waxed paper as most are waxed with paraffin.
  4. Freeze foods that are purees, soft, or liquid by first freezing in mini muffin or regular sized muffin tins. Pop out of tins and store them in mason jars or a cheap plastic freezer container lined with parchment paper.
  5. Freeze soft, pureed or liquids directly in pint freezer-safe mason jars. Leave extra head space and add 1/4″ of water on top once frozen.
  6. Wrap fresh meat for the freezer in butcher paper and freezer tape. Then, wrap tightly with aluminum foil to seal out air. (Reuse that aluminum foil!)
  7. Line freezer safe ziplock bags with parchment paper before filing with food of choice.
  8. Line and wrap food with parchment paper before placing in a plastic storage container to freeze.
  9. Of course, if you have the cash you could always try these stainless steel containers or even the glass storage containers to freeze your goods.
  10. Make your own waxed boxes to freeze or refrigerate food in by brushing a thin layer of melted bee’s wax on the inside of used gift boxes. Allow to dry. Fill with food and seal edges with freezer tape to keep air out. Carefully wash them to reuse by using cold water and mild soap on a rag on the inside. Rinse with cool water on a rag and allow to air dry. Another option for waxed boxes would be to purchase some paper clam-shell type to go boxes like these and wax them with bees wax. Again, always with the intention of reusing them as many times as possible.
  11. Make  your own reusable waxed fabric to wrap cheese, leftovers, and baked goods in. My friend Wardeh at GNOWFGLINS does this to age and store her cheese in.
  12. Make your own reusable waxed fabric bags to store food in the refrigerator or room temperature.
  13. Refrigerate leftovers in mason jars or reclaimed jars.
  14. Short-term store leftovers in the refrigerator in the stainless steel pot the were cooked in with the lid on.
  15. If really pressed for a container to store in, use a glass or stainless mixing bowl with a plate on top for a lid. If you want to keep more air out, use a layer of plastic under the plate and be sure that the food is low enough not to touch the plastic.
  16. Store food in Chinese take out boxes (I would personally rewax the inside with bees wax to avoid parafin). They can be reused several times by washing with mild soap and water and allowing to dry. You can freeze  (even liquids) in them by sealing all the openings  on top and bottom with freezer tape. Or check out these cute silicone versions.
  17. For packed lunches, nothing beats these divided stainless steel lunch boxes or a paper bag with the waxed fabric bags mentioned above.
  18. Store beverages in glass jars, glass carafes, or reclaimed glass milk jugs.
  19. Store fresh fruits and veggies in paper bags, cardboard boxes, baskets or in mason jars with some water. Read this post from My Plastic Free-Life for a more complete list of how to store specific fruits and veggies without plastic.
  20. Store dry foods in the pantry in stainless steel canisters or (you guessed it!) mason jars or other salvaged glass containers.
  21. Spices and seasonings store well in 8oz mason jars or these stainless steel spice tins (which mount nicely on your refrigerator with magnets.

I am sure this is not a complete list. What are some ways you have avoided using plastic in your kitchen. Share your tips and ideas with us in the comments!

This post was shared on Real Food Wednesdays and Homemaking Link-Up

What You Should Really Be Feeding Your Baby and Toddler: Super Nutrition for Babies

Image Credit: kimi

Rice cereal first? Veggies only? Pureed meat first? Conflicting nutritional information for infants and children abounds. But just what are the best foods to feed an infant and toddler for optimum nutrition, growth and development? According to the USDA, an infant’s first food should be fortified infant cereal given as early as four months old. The USDA also advocates giving infants fruit juice as early as 6 months old, along with more fortified infant cereal and pureed fruits and veggies.  Are these options really the best way to nourish our children?

Authors Katherine Erlich, M.D. and Kelly Genzlinger, C.N.C, C.M.T.A address this question and many more in their new book Super Nutrition for Babies:

We see children’s health getting worse with each subsequent generation. Our children today are at grave risk, and parents’ worries are both many and valid. Tragically, the most recent generation of babies is slated to have shorter lifespans than their parents. This is unacceptable!

Erlich and Genzlinger propose that many contemporary diseases and illness are caused by our modern world which is full of toxins and nutrient-deficient foods. All of the toxins and nutrient deficiencies wreak havoc on our well-tuned bodies in multiple instances, thereby making pinpointing a diagnosis and giving proper treatment puzzling for modern medicine, which likes to look only at parts instead of the entire body. But take heart! Erlich and Genzlinger claim that by following the Super Nutrition program outlined in their book, these problems can be prevented, improved and in some cases cured.

Erlich and Genzlinger outline a nutritional program a la Weston A. Price that is based in the traditional wisdom of food preparation methods and diets. This wisdom directed parents to feed their babies the most nutrient-dense foods available. Such foods consist of poultry and red meat-including the fat and organs, eggs, wild game, fish, raw dairy, cultured foods, bone broths and sometimes insects. They would accompany these foods with what fruits, veggies, seeds, nuts and legumes that they could find seasonally.

The authors have organized the chapters of the book to coincide with the child’s age and development. Each chapter includes research-based information about the foods recommended to take and to avoid, helpful tips, additional resources and several recipes.

Even better than the wonderful organization is the humorous, yet apropos way the authors classify foods in the book. Erlich and Genzlinger have grouped the foods discussed in Super Nutrition into four categories using the acronyms CRAP (Chemical, Removes body’s nutrients, Addictive, Processed), OKAY (Ordinary, Knockoffs of real food, Adequate-not optimal, Yield sub-par health if fed exclusively) , PURE (Pasture based, Unadulterated, Rich in nutrients, Enzyme Containing) and POWER (Protective, Optimal nutrition, Wisdom of the ancients, Enriching, Regenerating). Each of these acronyms accurately describes the foods categorized within them both with their names and what they stand for making the guidelines very simple for anyone to understand and implement.

Written with the warm voices of concerned parents rather than removed health practitioners, the authors inform their readers with plainly stated research without bombarding them and encourage their readers with helpful tips, tricks, easy to follow, simple and delicious recipes, real life suggestions for specific scenarios and candid remarks.

Implementing and practicing Super Nutrition is not easy…if you want easy, stick with the Standard American Diet-its entire premise is convenience. If, however, you want optimal health for your baby, then you’ll have to give up some conveniences.


Backed by science and time-honored wisdom, Erlich and Genzlinger offer parents a priceless baby shower gift in Super Nutrition for Babies. Basic to understand, yet a wealth of invaluable information, Super Nutrition for Babies is a foundational resource for expectant parents and anyone who has children of any age for that matter. These nutritional guidelines surpass infancy and should be adopted into the lives of anyone seeking optimal health.


This book has become my new standard baby shower gift. I am astounded by the clarity and heart with which this book is written with and only wish it were available and gifted to me seven years ago when I was pregnant with my first. I fed my first child a diet mainly consisting of OKAY foods and CRAP foods. My good intentions only got me so far. -Jami


Make the Cheese You’ve Always Wanted! GNOWFGLINS Cultured Dairy eBook Giveaway

Homemade Cheese
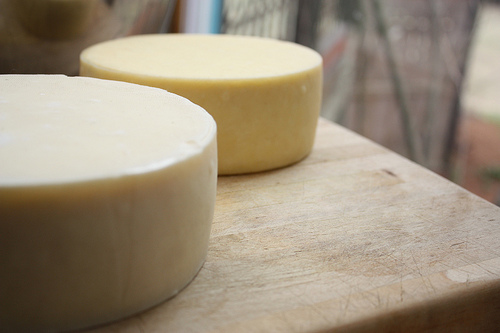
Photo Credit: J.W. Hamner

Maybe you’re like me and dream of giant wheels of cheese aging in a specially cooled room alongside links of fermented salumis, hanging country hams and jars of lactofermented vegetables because you want to do it all! Perhaps you want to learn to culture dairy for health reasons or self-sufficiency. Maybe it just sounds fun. Whatever your reason, learning to culture your own yogurt, kefir, soft cheese and hard cheese can seem like a task that’s not for the faint of heart, after all there’s the special equipment, the special ingredients, precise measurements and careful techniques.

Making your own cultured dairy is worthwhile for several reasons:

  • To ensure that all the dairy you consume is made with the best quality dairy you can afford/get.
  • To retain enzymes, vitamins and good bacteria in the dairy that are lost in their commercial counterparts due to the high processing heats which translates to a healthy gut and better functioning digestion and immune system.
  • To be able to consume quality dairy devoid of additives, preservatives and synthetic ingredients.
  • To use up all of that lovely milk from your dairy cow or goats!


But take heart! You don’t need to go it alone. Wardeh at GNOWFGLINS has put together an amazing 119 page, 18 - Lesson Cultured Dairy and Basic Cheese eBook.

This eBook includes:

  • Simple, well-articulated lessons that are easy to follow
  • Complete ingredient and equipment lists for each lesson
  • Color photos
  • Tips on where and what equipment to purchase
  • Suggested schedules
  • Tasty recipe suggestions to use your creations in
  • Troubleshooting tips

The Cultured Dairy eBook Covers these topics:

  1. About Cultured Dairy and Cheesemaking
  2. Sour Cream and Whole Milk Buttermilk
  3. Cultured Butter and Buttermilk
  4. Traditional Yogurt
  5. Clabbered Milk and Cheese
  6. Just-Like-The-Store Yogurt*
  7. Beyond Kefir: Kefir, Kefir Cream, Kefir Ice Cream, Kefir Cheese, and Kefir Cheese Balls
  8. Ricotta* and Soft Cheese
  9. Cottage Cheese
  10. Feta Cheese
  11. Middle Eastern Fresh Cheese
  12. Queso Fresco Cheese
  13. Fresh Cheddar Cheese
  14. Traditional Mozarella Cheese*
  15. Propagating Mother Cultures
  16. Bonus! Waxing Cheese
  17. Bonus! Cultured, Flavored Cream Cheese
  18. Bonus! Molding Soft Cheese
  19. Appendix 1: Dairy Kefir (from Fundamentals eCourse)
  20. Appendix 2: Soft Cheese (from Fundamentals eCourse)

*Not raw.

Perhaps you want a little more assistance in your cheesemaking endeavors. In that case, you may want to do the Cultured Dairy and Basic Cheese eCourse (this is a different product than the eBook, but covers the same topics above and comes with more amenities) which comes complete with videos that show step-by-step how to make everything from creamy yogurt, to cultured butter, to fresh cheddar. Plus, you will have access to the private forum where you can ask any questions and get help quickly, not to mention mingle with some awfully nice folk. 😉 And when you become a GNOWFGLINS eCourse member, you not only get access to the eCourse you originally were interested in, but you gain access to ALL of the eCourses. That is something to smile about.

I highly recommend you pick up a copy of the Cultured Dairy and Basic Cheese eBook. I have been making my own cultured dairy for some time now and had to learn with many mistakes, research and time consuming Googling. I wish Wardeh had this eBook out when I began. The copious notes and detailed step-by-step along with the science behind it all wrapped up in one perfect package was exactly what I had needed.

Here’s your chance to win a free copy of the Cultured Dairy and Basic Cheese eBook!

Here’s how:

1. Use the easy to use Rafflecopter widget below. There is only one mandatory entry which is to subscribe to Eat Nourishing via email. Then you won’t miss any recipes!  There are even two options, a daily email or a weekly digest. If you’re already signed up, click the button anyway to get your entry. Be sure to enter the email address you’re subscribed with in the “Extra Info” box, so I can verify your entry.

You can unsubscribe at any time, but you need to be subscribed in order to be eligible for this prize and any future prizes.

2. Recommended: Do any other optional things for extra entries!  Be sure to leave extra info for verification purposes where applicable.

Continue reading “Make the Cheese You’ve Always Wanted! GNOWFGLINS Cultured Dairy eBook Giveaway”

Tropical Traditions Organic Coconut Flour - What Can I Do with It?

Really, the question would be better asked, “What should I do with it now?!” I was first introduced to gluten-free baking about six or seven years ago. Our family has a friend with Celiac disease and, well, I like to bake and cook things for people, so it became imperative that I learned the mysterious ways of the gluten-free baker. Long story short, while I can and do bake with special blends of rice, bean and starch flours, I love the ease of using coconut flour; it’s super versatile and has a much less grainy texture than say rice flour.

The trick to coconut flour is eggs. Lots of eggs. It’s not uncommon to have 6 to 12 eggs in a recipe. (Score some extra protein in baked goods!) It also helps to be aware that coconut flour is extremely dry since it’s made from the leftover pulp after making coconut milk. The pulp is dried and then ground into a powder. Because of it’s dryness, coconut flour will readily suck up moisture in recipes. For this reason, batters and doughs will often seem thicker than their wheat counterparts. No worries. But back to the eggs. Eggs are important because coconut flour lacks gluten or anything to really keep it bound up. If you make a coconut flour recipe without eggs (or an appropriate substitute) you will end up with a crumbly mess. A pretty safe ratio that I generally use is one large egg for every 1/4 cup of coconut flour.

Tropical Traditions is one of my favorite brands of coconut flour mainly because of it’s purity and their harvesting methods. The price is also favorable because a little coconut flour goes a long way.

Read: How does coconut flour compare to almond flour for baking?


Here are a few wonderful recipes you can make with coconut flour from Tropical Traditions:

Coconut Flour Brownies

Grain-Free, Guilt-Free Coconut Flour Waffles

Coconut Flour Vanilla Doughnuts

Coconut Lemon Bars

Savory Coconut Flour Zucchini Muffins

I've also made the yummy No-Fail Coconut Flour Chocolate Cake on their recipe blog. http://www.freecoconutrecipes.com

Enter to win your very own bag of coconut flour from Tropical Traditions!

Here’s how:

1. Use the easy to use Rafflecopter widget below. There is only one mandatory entry which is to subscribe to Eat Nourishing via email. Then you won’t miss any recipes!  If you’re already signed up, click the button anyway to get your entry. Be sure to enter the email address you’re subscribed with in the “Extra Info” box, so I can verify your entry.

You can unsubscribe at any time, but you need to be subscribed in order to be eligible for this prize and any future prizes.

2. Recommended: Do any other optional things for extra entries!  Be sure to leave extra info for verification purposes where applicable.


a Rafflecopter giveaway