There are several ways to make mascarpone cheese. Commercially a sort of quick mascarpone is made by using tartaric acid to separate the curds from the whey, but this results in a grainy texture and, more importantly, no active cultures! Some recipes call for a mixture of cream and whole milk and then draining the whey to get a thicker curd, but I am going to share the absolute easiest way to make mascarpone cheese that can even be made with raw milk.
Mascarpone should be silky smooth, thick and rich with a slight tang. It’s super simple to make your very own and you can use it to top pancakes, waffles, dip fruit in, or make your own authentic tiramisu or cannolis.
Place cream into a quart sized mason jar. Add the kefir. Cover loosely and allow to sit at room temperature for 24 hours. After this time you should have a thick curd that should not need straining. If it’s too runny, feel free to drain some whey out.
If you used a lighter fat content cream (or half cream and half milk), you may want to strain your curd in some cheese cloth for a few hours to let some whey drain out.
Refrigerate and enjoy! This will keep for a few weeks. 🙂
NOTE: You can also make this by using creme fraiche in place of the kefir if you have it, but I really like the flavor of the kefir mascarpone and think it makes a thicker cheese.
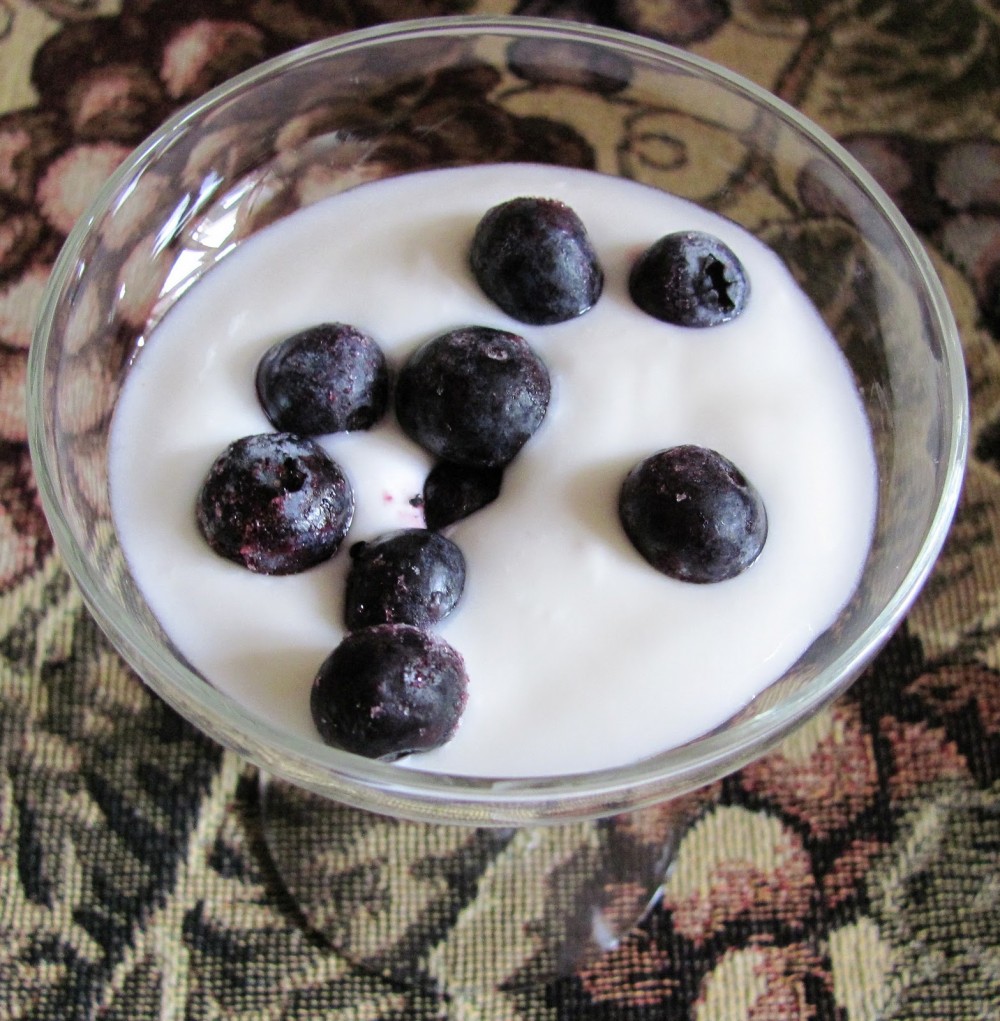
Thick, delicious, Greek-style yogurt made at home. By-product, whey.
Fill sink with cold water to the point where water will not get into pot when placing it in water. The water will be used to cool milk. Turn crock pot on to warm setting. The crock pot will be used to incubate the milk while it turns into yogurt.
On a stove, heat 1/2 gallon of milk in a pot, stirring constantly, until it reaches 185 degrees.
Place pot in the sink with cold water (make sure no water gets in pot) and let cool to 100-110 degrees. This is really important. If milk is too hot it will kill the live cultures and you will not get yogurt.
Measure out 1 1/2 cups of milk into a separate container and add 1/4 cup yogurt (also known as starter). This step is to temper the yogurt. Add milk/yogurt mixture back into pot. Mix well.
Unplug crock pot. I made sure my crock pot was not hot, just warm. Pour milk into crock pot, put lid on, and wrap crock pot with a towel. Let sit for 8-12 hours.
After 8-12 hours has passed, unwrap crock pot and you should have yogurt! At this point I place it in the fridge to set better. This is not a necessary step. I find timing the yogurt to be done incubating before bed best, that way yogurt can sit in fridge over night.
Store 1/4 cup yogurt in a separate container to use as the starter for the next time you make yogurt. (Be sure to use it within 6-8 days)
If you just want yogurt you can stop at this point and add whatever ingredients to flavor the yogurt to your preference.
However, if you like Greek-style yogurt then follow these steps:
Place cheesecloth in strainer. I use enough cheese cloth to have multiple layers. Place strainer in a bowl. Put yogurt in strainer with cheese cloth. Let sit for 1 hour. Yogurt will be thicker and creamier. As a result, there will be whey in the bowl you set your strainer in!
Separate yogurt from cheese cloth into a mason jar or container to store in fridge. I added raw agave nectar and pure vanilla extract to taste and then berries when I sit down to eat it.
The whey I put into a glass mason jar. It can keep for six months in the fridge, however, be sure to make sure it hasn’t gone bad when using. A foul odor is a good indicator.
I found this to be really easy, but I am putting it at a moderate difficulty level due to all of the temperature changes. Yogurt will yield as much milk as you started with, in this recipe yogurt will yield 1/2 gallon. Strained yogurt will yield less since the whey is being separated from the yogurt, but the strained yogurt and whey should yield 1/2 gallon total.
This is the BEST yogurt we’ve ever had. My husband loves it, and he’s not that easy to please. 🙂 I enjoy it plain, but my favorite way is with a little real maple syrup drizzled on top.
Pour 2 quarts (1/2 gallon) raw milk into your 3.5 - 4 quart Crockpot.
Put on the lid, plug it in, turn it on low and set the timer for 2 1/2 hours (2.5 hours.)
Turn off and unplug the Crockpot and let it sit undisturbed for 3 more hours. Then, measure out 1/2 cup plain yogurt (with live cultures) and mix it into 2 cups of the warm milk.
Pour the milk with the yogurt back into the Crockpot, mix well and put on the lid. Then wrap the whole thing up with a couple of big fuzzy towels or a nice warm blanket and let it sit for another 8 hours. Longer (if you are doing it overnight) will not hurt (up to a point!)
Pour it into a container (I use a half-gallon jar) put on the lid and refrigerate.
Creamy and delicious, this yogurt is full of live enzymes and probiotics…and especially nourishing when made with 100% grassfed milk!
Gently heat milk to 110 degrees.
While the rest is warming, dissolve gelatin in about 1/2 c. of the milk, then heat in a little saucepan until dissolved.
Let cool, then add to the rest of the milk.
After bringing to 110, mix a little bit with the yogurt until dissolved, then add the rest.
Pour into a perfectly clean half-gallon jar, and replace the lid loosely.
Dehydrate at 108 for 8 hours, then let cool before transferring to the refrigerator.
Yogurt should set up a bit more as it chills. Enjoy!
The most difficult part about making yogurt is keeping the temperature of the ferment stable and warm for a long enough period of time for the bacteria to do thier work. Using a crockpot as your fermentation vessle will make holding the temperature steady easier without the need for a yogurt maker.
Heat the milk to 185⁰F in a double boiler or in a heat proof bowl that snugly fits on top of pot of simmering water.
Remove the milk from the heat and let it cool to 105⁰-122⁰F. Placing your culture in milk that is too hot will kill the culture and milk that is too cool will not allow the reaction to occur.
Stir in the culture and place the yogurt into a glass container that has a tight fitting lid (I use pyrex dishes but I know others who use baby food jars). For store bought yogurt or homemade yogurt add ½ cup yogurt per 1 gallon of milk. If you are using cultures purchased from a cheese making supplier then follow the package instructions.
Set your jars in bottom of a slow cooker and fill with water and set it to “warm” setting. Be sure to keep a close eye on the temperature of the water.
Incubate the yogurt for 6-8 hours.
The trick is to keep the temperature of your yogurt between 98⁰ and 130⁰F. I have tried the crockpot method written above, but my “warm” setting was too hot. My solution was to turn the crockpot on low for 15 minutes. Then I turn the crockpot off and wrap in a towel and place it in a warm oven (preheated the oven to the lowest setting then turned it off and let it cool for 10 minutes before placing the yogurt in the oven). This method seems to give me the best results. You will have to play with the settings in your own home to come up with a solution that works best for you.
To stop the reaction, place your yogurt in the refrigerator. You can now flavor your yogurt with anything that you want. I like to add fruit and honey or fruit and maple syrup to mine.
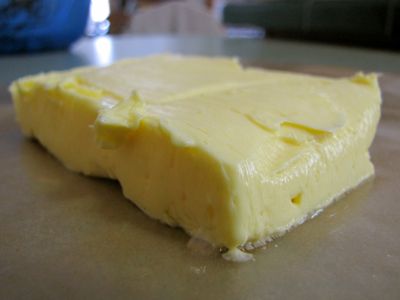
Start with cultured cream to make a butter that is sweet and sour with complex, wonderful flavors.
Stir the culture into the cream. Cover the jar with a cloth napkin secured by a rubber band. Leave at room temperature for 24 hours. Then transfer to the refrigerator to chill.
Put the chilled cultured cream in a mixer, food processor, or blender. (Don’t use a Vita-Mix or the mixture will heat up.) Whatever your container is, fill it it to less than half because the cream will expand during the churning.
Turn on the machine. The process of churning may take between 5 and 10 minutes. The cream will go through stages on its way to butter. First, it will expand its volume and become whipped cream. Then the butter solids will start to clump together and separate from the liquid (buttermilk). The whole mixture will appear grainy. Then the solids will clump together even more until you have big chunks of butter floating in buttermilk. Run machine just a minute or so more to complete the process of clumping the butter solids.
Put the butter solids in a bowl. Save the liquid buttermilk for soaking grains (unless it is stinky, which can happen if the cream got very sour).
Repeat with all the cream until all of it is converted into butter solids.
Add cold, clean water to the bowl and use a hard spoon to press and fold the butter into the sides of the bowl. The water will quickly turn clowdy as the remaining buttermilk releases from the butter solids.
Change the water repeatedly. Keep washing the butter until the water stays clear. When the water is clear, you have clean butter! The cleaner the butter, the longer it will last. The washing water isn’t true buttermilk as it is too watered down. It makes good water for animals or the compost.
Pour off the remaining water. Press and fold the butter more to release more water.
Mix in the sea salt.
Transfer the butter to some kind of mold, or you can just shape it into a log or chunks.
Wrap gently in natural wax paper or parchment paper. Put in additional wrappings if desired (to prevent off flavors or freezer burn). Refrigerate or freeze.
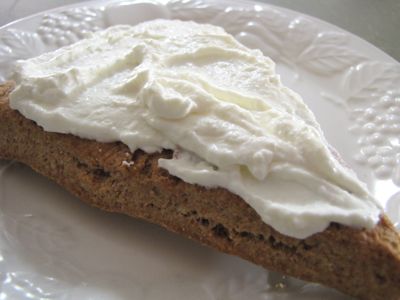
A super easy, versatile and tasty cheese — use in salad dressings or dips, in place of cream cheese, or spread on toast.
Put the milk in a half gallon or gallon size jar. Sprinkle the mesophilic culture on it and stir in with a wooden spoon.
Put the 1/4 cup of water in a little jar or cup. Add one drop of the double-strength liquid rennet. Stir well. Take one tablespoon of this solution and add it to the jar of milk. Stir well. (If using regular strength liquid rennet, mix one drop of it with the water, but add 2 tablespoons of the solution to the milk and stir well.) This solution will keep in the refrigerator for one or two weeks. If it smells disagreeable, toss it. (It will smell like nothing when it is still good.)
Cover the jar of milk with a cloth napkin and secure with a rubber band. Let sit out at room temperature to culture for 24 hours.
Place the colander inside a pot or bowl. Make sure it is big enough to catch up to a quart of the whey that will drip out. Layer two pieces of 90 thread count cheesecloth in the colander.
The milk should now be thick and gelled, much like a firm yogurt. Transfer these curds into the cheesecloth. It is okay if they fall apart. Do it gently, but don’t be concerned about keeping them all in one piece.
Tie up the opposite corners of the cheesecloth, making a bag to enclose the curds. Lay the ends of the cheesecloth on top of the bundle of curds in the colander. Don’t let the ends of the cheesecloth hang out of the colander, or the whey will drip down into a puddle on your counter.
Leave this setup out at room temperature for 24 hours, during which time the whey will drip out and the curds will thicken. You can do this in the refrigerator if you prefer a less sour cheese.
Untie the cheesecloth and check the consistency of the cheese. Let it hang longer if you wish the cheese to thicken more. At this point, it is usually spreadable and soft, thicker than mayonnaise but not dry.
Transfer the cheese to a clean bowl.
Optional: Add 1/2 teaspoon of sea salt. Stir. Adjust amount of salt to taste. Refrigerate.
Save and refrigerate the whey that drips out; it may be used in lacto-ferments.
Raw milk yogurt is very easy to make at home-even without a yogurt maker! This recipe uses the cooler method to keep the yogurt warm enough to culture properly.
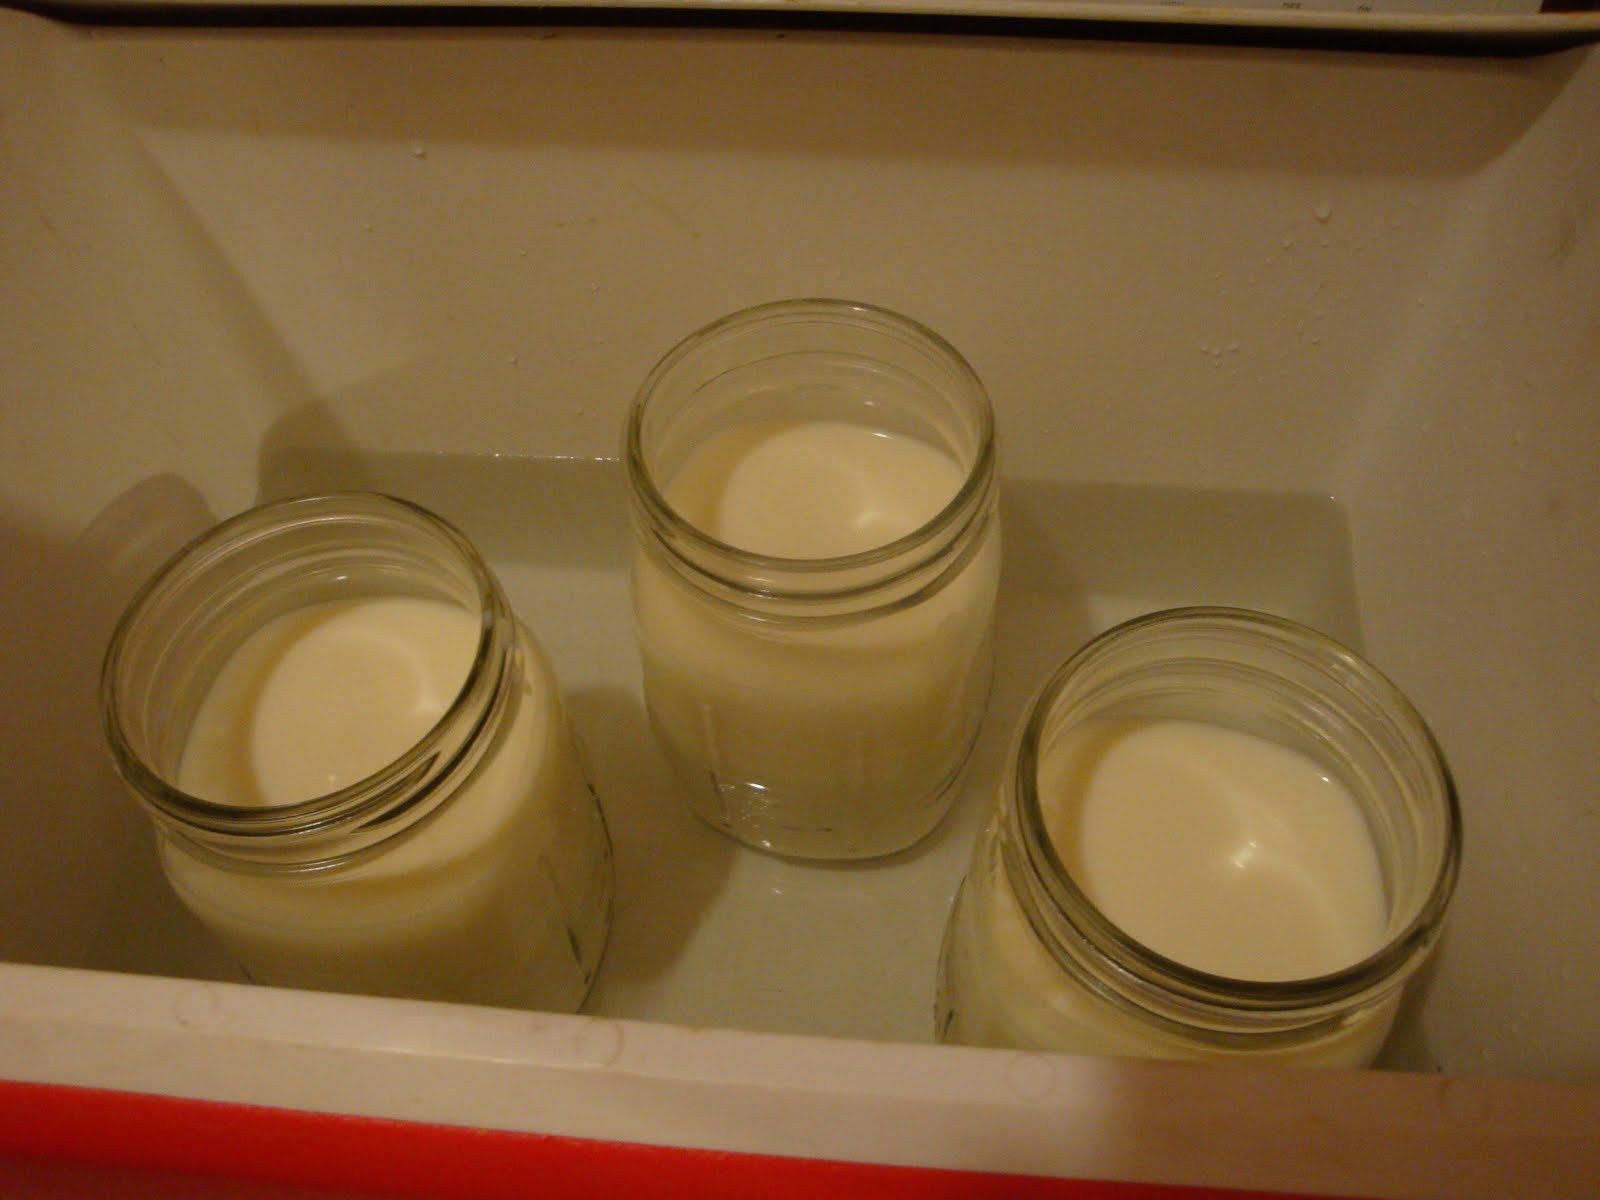
In a stockpot, place up to four 32-oz (1-quart) mason jars inside. Fill the jars with raw milk.
Fill the pot with warm water (about halfway up the mason jars) and gently begin heating at a low to medium temperature. Keep a close watch on the pot. Use a candy thermometer to gauge the temperature of the milk. The ideal temperature for growing yogurt is somewhere between 98-110 degrees, which should feel comfortably warm to the touch.
When the milk is warm enough, place 1-2 tablespoons of a good quality, no-additive, whole fat plain yogurt into each quart of milk, and stir well to mix the cultures.
Place the mason jars of milk into a cooler filled with very warm water. Close the cooler tightly and cover with blankets or towels for insulation.
Leave the milk to culture for 6-24 hours. If culturing for more than 6 hours, you may have to add more hot water to the cooler to maintain the proper temperature.
When your yogurt is done, store in the refrigerator. Keep back a portion of the fresh yogurt to culture the next batch.