I am not a big, elaborate breakfast person, but I do want to feed my family something healthy!
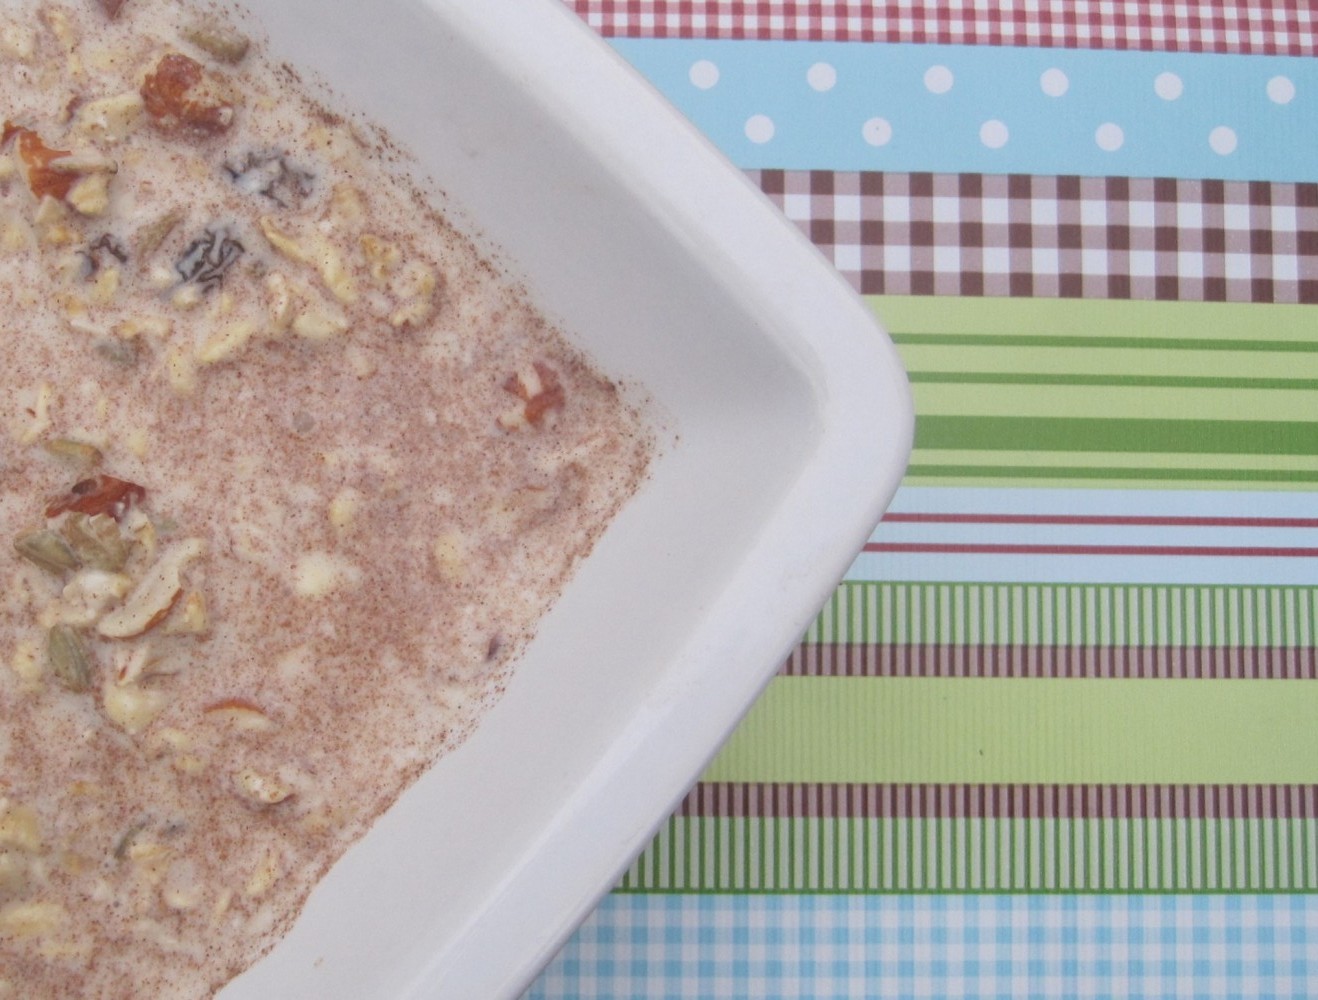
One of our favorite quick and easy breakfasts is this crockpot granola. I’ve been making it for years. It’s the simplest, best, granola recipe I’ve ever tried. It’s absolutely delicious, takes literally minutes to throw into the crockpot, and makes the house smell WONDERFUL too!
I always double it, making part into bars, which make a great portable snack or quick breakfast-on-the-run. I adapted the original recipe I was given years ago to use coconut oil rather than canola/vegetable oil and added nuts. Any nut will work, I generally use walnuts, but have used both pecans and almonds as well. I like to add chocolate chips when I make it into bars.
My kids love to eat this just like regular cold breakfast cereal in a bowl with milk. It’s definitely a staple in our house…you couldn’t ask for a simpler to make, more versatile or delicious recipe.
Combine all ingredients in your crockpot and cook on low for 5 hours or until brown, stirring occasionally. Make sure you keep the cover on the crockpot slightly cracked. The more frequently you stir, the finer the consistency. If you prefer clumpier granola, stir less.
Add raisins, dried fruits, chocolate chips…whatever you desire. This is delicious as a hot or cold cereal, as a snack, a topping for yogurt, or made into granola bars.
To make into bars: combine 2 cups granola w/2 beaten eggs, put in a lightly greased cookie sheet, bake at 350 for 15 minutes. Cut into bars and cool.
This keeps for several weeks in the refrigerator, and I bet it would freeze well too, but ours never lasts long enough for me to find out!
This quick and healthy breakfast can be modified with any fresh or dried fruit that you have on hand. You can also experiment with different seeds and nuts in this dish to give the couscous a different texture. This recipe is a nice alternative to your regular breakfast oatmeal.
Heat the couscous, milk, honey, cinnamon, and cranberries in a pot over medium heat. Stir frequently.
Remove the pot from the heat when all the milk has been absorbed into the couscous.
Place the couscous in bowls and sprinkle with pumpkin seeds. Serve warm.
Editor’s Note: Couscous should be soaked overnight or at least 8 hours in warm filtered water (enough to cover) along with an acidic medium such as lemon juice, vinegar or whey (approx 1-2 Tbsp). Soaking grains properly before preparation will allow you to absorb nearly double the minerals and vitamins from grains. Learn more about the importance of soaking grains on the Phytic Acid website. After soaking, simply discard soaking liquid, rinse, and proceed with the recipe as above..
A creamy, delicious, widely-adaptable and nutritious breakfast dish.
This recipe is a great base for riffing on your own! While I note organic is preferred for everything, do the best you can, and don’t feel bad about using non-organic products if they are not available or are too expensive in your area. Even with “less whole” substitutions, this is a tasty and nutritious way to start the day (and it’s not a bad snack, either!)
This recipe can easily be made vegan/dairy-free, gluten-free (using rice processed in a GF facility,) and allergen-free by selecting from the substitutes.
Substitutions:
For the maple syrup, you can use 2 Tablespoons honey plus 1 Tablespoon molasses, or 2 Tablespoons agave nectar. I have not tried granulated sweeteners with this recipe, but they should work just fine added in place of the syrup at the same point.
For the milk, you can use an equal amount of coconut milk, goat or sheep milk, nut milk, or anything your family enjoys. Water is also possible, though the creamy texture will be affected.
For the rice, nearly any grain will work for this recipe, if soaked and pre-cooked.
Toppings:
Chopped nuts, dried fruit, rolled oats (soaked, et cetera as applicable)
Fresh cream (organic, raw preferred)
Additional sweetener, such as honey, maple syrup, or brown sugar
Sliced fresh fruit
Grated citrus zest (lemon and orange are both wonderful)
Vanilla bean paste (contains processed sugar, use with discretion)
Method:
My friend Millie at Real Food for Less Money came up with the base for this recipe, and I’m so glad she did!
Heat the rice and milk in a saucepan over medium heat until bubbly.
Turn the heat down to medium-low and cook to soften the rice, stirring often to help the rice break down a bit (about 5-10 minutes.)
Add the syrup (or subbed sweetener,) salt, and spices.
Stir well to mix and allow to continue cooking.
Break and beat the eggs in a separate small bowl.
Temper the eggs by adding a small spoonful of the rice mixture to the eggs, stirring quickly.
Add another spoonful of the hot rice mixture to the eggs, again stirring quickly and well.
Add the eggs to the rice mixture on the stove, stirring swiftly to prevent clots of eggs forming.
Remove from heat and add the vanilla and hazelnut extracts, stirring well to combine.
Top with your preferred toppings, pulling from the suggestions above or going completely off the chart with something else - so many delicious possibilities with this base!
I love oats… I love oatmeal… here is a new way to enjoy them for breakfast!
24 hours ahead of when you want to serve these, rinse the oat groats, cover them with water, about 2 inches above the oats. Stir in the whey and whole wheat flour. Cover and allow to soak at room temperature.
After 24 hours, drain and carefully rinse. Return the soaked oats to a heavy-bottomed sauce pan.
Add water until it is 1 inch above oats. Bring to a boil and simmer for approximately 30 minutes, covered, tasting a few now and then until they are as tender as you want them to be. Stir frequently.Be sure to keep enough water in the pan to cover them.
When the groats are done, strain out any extra water. Serve with butter, milk, and maple syrup or other natural sweetener.
Move over Puffed Wheat! Here is a healthy and delicious alternative for those who enjoy a cold cereal for breakfast!
Put the oil in a small heavy-bottomed saucepan, melt on stove top over medium heat and add the popcorn. Cover the pan. (Adjust pan size to the number of servings you are making.)
Turn up the heat to medium/high and continually move the pan back and forth quickly over the burner to prevent burning the popcorn. When the popping has nearly stopped, take the pan off the stove.
Pour popped corn into a cereal bowl and top with nice cold raw milk and real maple syrup.
Very very yummy. You can make the popped corn a bit ahead of time, if you like.
This will take your oatmeal to a whole new level! A complete meal in a bowl.
The night before, combine oats, salt, flour, whey, raisins and water. Cover and let soak until morning.
In the morning, beat the eggs and milk together thoroughly.
On medium heat, cook the oat mixture until not quite as thick as you would normally, stirring frequently.
Gradually stir in the egg/milk mixture, stirring well. Keep stirring until it has returned to a simmer to be sure the eggs are thoroughly cooked. Remove from heat.
Top each serving with a dollop of butter and some maple syrup or raw honey.
Stand back and enjoy the ooooh’s and ahhhh’s from your loved ones!
This breakfast is so quick and easy to make ahead of time, then is ready to serve in the morning. It can also be changed up to incorporate different flavors. Try adding a variety of dried and fresh fruits, nuts and spices.
The day before, place yogurt, grains, raisins, maple syrup, milk, cinnamon and vanilla in glass bowl or jar. Mix well, cover and refrigerate. In the morning, sprinkle with salt, mix and serve up portions in bowls. Top each bowl with nuts, fruit and additional milk or yogurt if desired.
Delicious creamy oatmeal made from freshly rolled oats. Very little work involved. Simply mix, sleep, cook.
The night before, I combine all of the ingredients in a saucepan with a lid and let it sit overnight. Then in the morning, on medium heat, and stirring constantly, I cook the oatmeal until it is as thick as I like.
I serve it with butter, maple syrup and fresh goat milk!
Sprout your brown rice before cooking to increase nutrient availability and mineral absorption. It’s actually not any more difficult than soaking your brown rice.
Rinse rice well and place in a bowl or mason jar along with about 4 cups of warm pure water. Cover and let stand on the counter for 4-8 hours.
Drain. Rinse. This time do not refill with water. Cover again and leave on the counter.
Drain and rinse the brown rice in this manner 2 to 3 times a day until you see little tails about 1/4″ long coming out of the end. It usually only takes 2- 3 days.
To cook:
Rinse rice and place in a medium saucepan with 3 cups of water or homemade chicken stock. Bring to a boil. Remove the scum that comes to the top. Boil until water is about the same level as the rice. Cover with a lid and shut off the burner. Allow to sit for 45 minutes to steam. Fluff with a fork and serve.
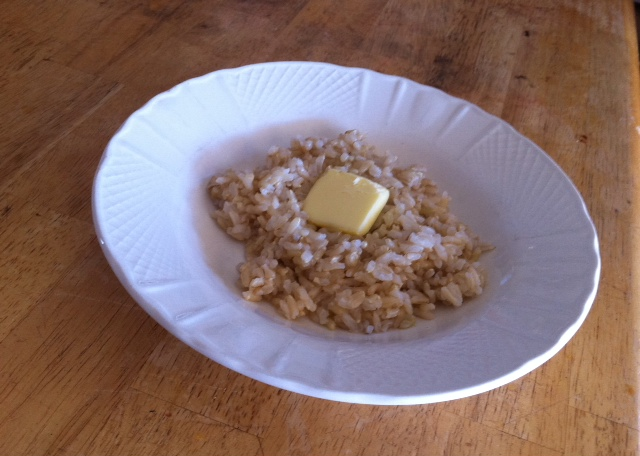
No more rice cookers or constant surveillance over the stove top. No more dry, mushy, or burned rice. For perfectly cooked, easiest brown or white rice, baking the grains in the oven is my go-to method. Bone broths, like fish or chicken stock will increase the nutrition and digestibility of the grains.

Preheat oven to 375F.
Spread rice in an oven safe container; an 8 inch square glass baking dish, an oven safe stockpot, or dutch oven all work.
Stir in boiling stock or water, oil, and salt. Cover baking dish tightly with foil or lid if using a pot.
Bake until rice is tender, about one hour for brown rice, about 35 minutes for white rice.
Remove rice from oven, fluff lightly with a fork. If not serving right away, cover the dish with a clean kitchen towel.
Note: If you soak your rice before cooking, measure the amount of water you are soaking the rice with. Soak. Before baking, strain the soaking water into a measuring cup to calculate how much water was absorbed by the rice. Subtract this amount from the liquid amount called for in the recipe. You will only need to do this once if your soaking times are consistent.