As a busy mom, who runs a home business, homeschools her kids, and cooks real food, I can’t usually spare the time for “fancy” foods. Hollandaise sauce was one of those fancy foods I never thought to try because it seemed like it was too much fuss for a sauce. Who needs a sauce over eggs anyway? Who has time for sauces?
But after hearing so much about hollandaise-how nourishing it was and how delectable, and my mom telling me how easy it really was to make, plus I was trying to get my kids to eat more butter, I decided to see if I couldn’t make a busy mom version of the fancy stuff. Turns out, it’s no big deal to make and the taste is super worth it! Hollandaise is for more than just Eggs Benedict. Serve it over just about any lightly steamed veggie or over fish. My kids were excited to try as a dipping sauce for steamed veggies. Total win!
The extra sauce is easily reheated in a double-boiler…if there is any extra. 😉
Preheat your blender by filling with very warm tap water and allowing to sit. You may also make this recipe with an immersion (stick) blender.
Melt the butter gently over low heat until very hot, but do not allow to brown. Remove from heat.
Meanwhile, pour the water out of your blender, blend the egg yolks with the lemon juice, cayenne pepper, and salt (if using). This step can be done in a canning jar with an immersion blender, if preferred.
With the blender running, slowly drizzle in the hot melted butter. Mixture will thicken considerably into a velvety, smooth sauce. Once it’s thickened, it’s done! Enjoy!
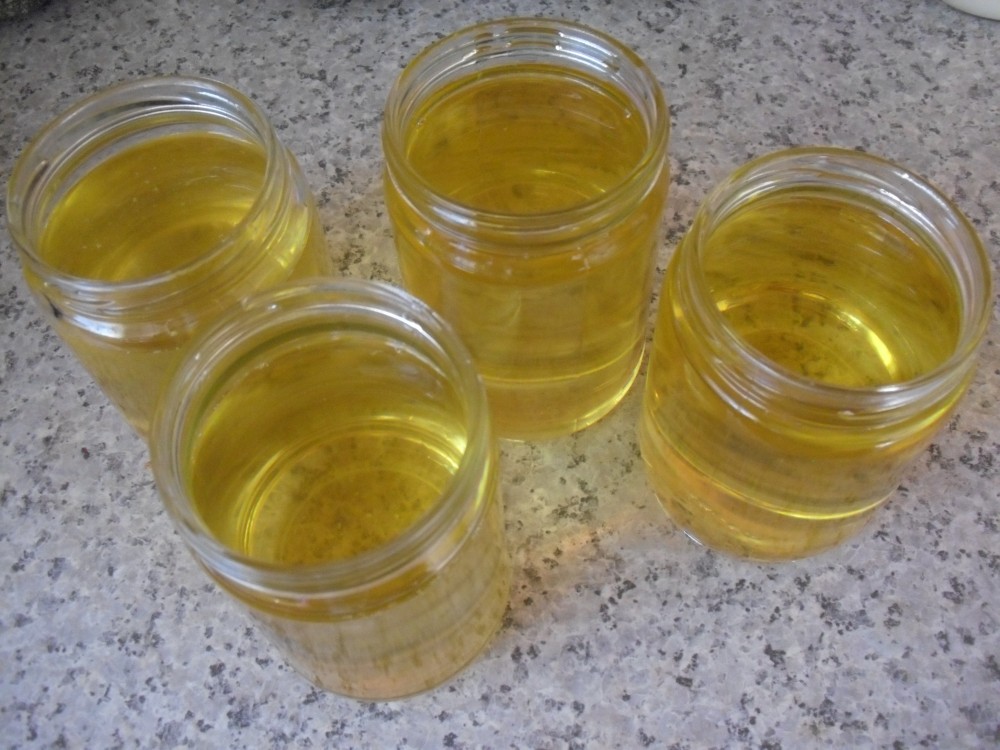
Preserving fresh herbs from your garden is very easy and can provide wonderful flavor (and a significant boost in nutrition) for your family’s meals for the whole year!
Bring a quantity (large or small) of freshly picked herbs into the kitchen. The best time to pick them is just before they bloom, but they may be used later as well.
Wash herbs in plenty of cold water. Remove leaves from the stems and pat dry in a clean cotton dish towel or spin them in a salad spinner to remove excess water.
Process the leaves in a food processor just until they are chopped. Do not puree.
Put the chopped leaves into a glass jar. Pour raw vinegar over the herbs until they are covered.
Store this jar, covered, in the refrigerator.
The herbs will shrink over time, but they are still wonderful to use. You can scoop out the amount you need and squeeze out the vinegar, or not, depending on your recipe. They will keep for many months.
The vinegar is a wonderful addition to homemade salad dressings and marinades as well, being full of flavor!
I do this with basil, oregano, lavender, sage, thyme, and parsley. If you have other favorite herbs, they should do well also!
Raw apple cider vinegar is the most easily sourced, but there are other wonderful raw vinegars available, for instance, wine, rice, and balsamic. Keep your eyes open at your favorite health food outlet, and you can tailor the combinations to your own menus.
Everyone loves taco night. But when you’re in the pinch of the weeknight bustle, it’s easy to be tempted by expensive instant mixes (with ingredients that make you shudder). Save time and money by storing this simple homemade mix in your cupboard — and make taco night everyone’s favorite again.
Combine ingredients in a jar. Shake to combine.
2-3 TB of mix = 1 instant package of taco seasoning.
To cook, add 2-3 TB of mix to 1lb of beans and/or ground meat.
NOTE: Not a fan of traditional tacos or want to avoid corn? Make a salad using lettuce, cheese, salsa, meat (beef, chicken, etc), beans, and guacamole.
TIP: To save money, we buy our spices in bulk from a local health food store.
Move over peanut butter! Coconut butter is simple to make and is rich and creamy. Sure, you could buy it, but it’s a lot more expensive that way. You can use coconut butter as a substitute for just about any recipe calling for a nut butter and it can also be used as a dairy-free substitute for butter in baking. We like it as a dip for fruit or spread on bread with some preserves. Can you say CBJ sandwich?! Mmmm. Be careful this stuff is addicting when eating it by the spoonful.
Place shredded coconut in a food processor and blend. While it is going, add in the coconut oil. Blend until the shreds begin to stick together.
Scrape down the sides and blend for five more minutes.
Scrape down sides again and blend until creamy and liquidy. About 15 minutes total blending time.
Pour into a clean mason jar and store at room temperature. Like coconut oil, coconut butter will harden at temperatures below 76 degrees. Gently warm to use.
*Depending on what brand of coconut you use you may need a tiny bit more coconut oil. Some coconut is processed a little differently and is left with less oil in it and therefore drier.
Recipe was shared on Homemaking Link-Up
Buying enchilada sauce has been one of the last store-bought sauces found in our pantry, and I just couldn’t bear buying another jar. This recipe is quick, rich, and freezes really well. I’m freezing mine in pint-sized mason jars; the perfect amount for a pan o’ enchiladas (a very good freezer meal) and there may be some some to spare to make dressing for a tasty enchilada salad.
In a large pot, heat fat of choice over medium-high heat until melted. Meanwhile, whisk arrowroot powder in water until smooth. Add to fat. Add chili powder & stir for about half a minute. The arrowroot will get really gelatinous. Don’t let it scare you.
Whisk in all remaining ingredients except the salt in the pot. Bring to a boil, then reduce heat to low and simmer for 15 minutes. Stir in salt. Pour in prepared 1/2-pint or 1-pint mason jars & allow to cool. Fasten the lids and freeze until you’re ready to use.
The arrowroot gives this soup a great consistency…like what you would expect from a can. Super easy, too!
Melt butter, then stir in arrowroot and seasonings, stirring until bubbly. Slowly add milk and broth, whisking constantly. Remove from heat, and use in recipes.
*Editor’s Note: This is a basic cream of chicken soup recipe. You can add other things like cheese, mushrooms or celery to create other “cream of” soup bases.
Coming up with homemade seasonings has taken a while. I don’t know why; they’re so easy to assemble and such a better choice than anything a supermarket has to offer. Be sure to purchase only organic spices as most conventional ones have been irradiated (not good). You can make this in big batches to have on hand, or just throw the spices on the beef as it cooks, which is what I find myself doing most of the time. Whenever possible, I like to use fresh garlic to benefit from it’s many good properties, but obviously if you’re wanting to make a big batch, it’s better to go with dried/ground so it can be stored. A little jar of this is a great addition to a gift basket, or presented in a cute half-pint mason jar is a sweet (er, spicy) present on it’s own. Here is our taco seasoning that my kids have decided is their favorite (they are my hardest critiques, you know):
Mix all ingredients. Store in an airtight container (I used clean old spice jars or little mason jars)
Use about 3 tablespoons mix with 1 pound browned ground beef (or meat of your choice. It’s also great with chicken). Mix with about 1/2 cup water and let it simmer so the meat really absorbs the flavor without drying out.
I love enchiladas. They are probably one of my favorite foods. I never realized how easy it was to make your own sauce at home, where you control the quality of the ingredients. You’ll never have to buy the canned stuff again!
Combine all ingredients, except vinegar, in an large soup pot. Enameled cast iron works well to keep the acid in the tomato from leaching a metallic flavor from the pot. Stir everything together and bring to a simmer. Reduce heat to low and cook for 30 minutes. Stir in the vinegar and continue to cook for 15 more minutes. Remove from heat and you’re ready to serve!
The sauce freezes very well. You can double, triple, or more the recipe and freeze. Make sure you leave enough room for it to expand as it freezes.
My mother always made the best “milk” gravy (of course!) I have taken her method and adapted it to a healthier lifestyle. I think she would be pleased. 🙂
At least 7 hours before you plan to make the gravy, or up to 12 hours ahead of time, combine the whole wheat flour with the kefir/milk mixture. Cover tightly and let sit on the kitchen counter.
On Turkey roasting day, put all of the giblets and the neck into a saucepan and cover with water. Simmer for at least one hour and then allow to cool. Drain. Chop the giblets and remove the meat from the neck. Reserve all of this for the gravy (unless you really want to put it in the stuffing, in which case, you can skip this step.)
When the Turkey is all done roasting, use a turkey baster to remove the liquid from the roasting pan and put it into a heavy-bottomed pan. I like to use a cast iron skillet for this. If you don’t have 3 cups of turkey broth, add some homemade poultry stock.
Bring the broth to a boil, and gradually stir in the flour/milk/kefir mixture with a wisk. Simmer for 1 minute. Add the 1/2 cup fresh milk and heat all together a little more. If your gravy is thicker than you like, just add in a little more milk or broth.
Add Sea salt and freshly ground pepper to taste.
If you wish, after it is all done, and you have it seasoned, you can sprinkle in a little ground poultry seasoning to taste.
That’s it! EASY
Serve this with turkey, stuffing and mashed potatoes. If there is extra, it is wonderful just poured warm over some nice fresh bread and eaten with a fork.
Another way to use up extra gravy is what I call “Thanksgiving Pie.” Just chop up some of the turkey meat, mix it with leftover stuffing, fill a pie plate with it, pour some gravy over it, and top with mashed potatoes. This may be covered tightly and frozen, or you can warm it up in the oven right away. We love this as a main dish, and it will keep frozen nicely for several weeks.
This goes together in a snap and doesn’t even require cooking. Just cranberries, an orange, good quality honey and a food processor and you are set!
In a medium sized food processor bowl, combine ingredients and process until desired consistency. Taste and adjust sweetness by adding more honey if needed, but maintain refreshing tartness.
Chill and serve.
Leftover relish lasts about a week in the fridge, and is great on its own, on gluten-free muffins or bread, or stirred into raw, organic, grass-fed yogurt!
This recipe is GAPS legal, raw, vegetarian friendly and all around delicious!
Want to make your own tallow? It’s a very easy process!
Cut the suet into chunks - try to keep them a uniform size, aim for 1-2″ cubes.
Place into crockpot on low heat.
Add about a cup of water, this keeps the suet from burning before it melts.
Cover, stir about every hour with a wooden spoon.
As the cubes of suet melt, the cracklins will float to the top. Watch the color of these, because if they burn they can give an off flavor to the tallow.
When the cracklins are golden brown and all the cubes of suet have melted, turn off the heat and allow it to cool for about an hour.
Using a fine mesh strainer and a canning funnel, pour the melted fat CAREFULLY into jars. Remember, it will be very hot!
Use the back of a wooden spoon to gently press the remaining tallow out of the cracklins in the strainer. Allow these to cool, and then they can be frozen and used to flavor soups, added to burgers, salads, etc!
Keep tallow refrigerated. It will harden and turn white as it cools. Tallow can be used in place of oil in almost any recipe!
A simple method for preserving your fresh Genovese Basil. This will keep at least a year in the refrigerator and may be used in any dish that calls for basil.

Wash basil and pat dry between towels or twirl in a salad spinner.
Remove leaves from stems.
Chop leaves in a food processor.
Place chopped leaves in lidded jar and cover with Raw Apple Cider Vinegar.
Store in the refrigerator.