We all should be eating more fermented foods and garlic is one food that many of us consume regularly. Why not ferment it to add some additional probiotics to our diets?
Place the whole garlic heads on a sheet pan and roast the garlic in the oven, at as low of a heat as you can go, for 45-60 minutes. The skins should be peel right off, but the garlic should still be firm. You don’t want to overcook the garlic, in order to preserve as many of the nutritional compounds as possible.
Remove from the oven and let the cloves cool for 10-15 minutes. The next part is a bit tedious. You have to peel each clove of garlic.
Once you have the garlic peeled, place all of the cloves in a clean quart mason jar. In a separate dish, dissolve the salt into 2 cups of filtered water. Add the whey (only if water is room temperature and not hot, otherwise it will kill the bacteria). Pour the liquid over the garlic cloves. If you don’t have quite enough liquid, just add a little more water until the garlic is about one inch below the liquid and the liquid is about one inch below the top of the jar. Shake everything around to mix and cover with a lid (not too tight). Leave at room temperature for 8-10 days and then move to cold storage.
Pickled garlic will keep for at 6 months to a year, if not longer.
Note: If your garlic turns blue or green, don’t be alarmed! The color change happens when the anthocyanins and/or the sulfur compounds react with the acidity or minerals in the water. Many times, it’s the reaction of the garlic to copper in the water. It is still totally edible and won’t hurt you.
Here is the way this extremely nourishing condiment was traditionally prepared, lacto-fermented style. This is a raw recipe that is chock full of enzymes that aid in digestion and the immune system. Cabbage is an amazing superfood that provides a lot of vitamin C, fiber, and is rich in cancer-inhibiting elements. Eating cabbage in the form of raw, lacto-fermented sauerkraut is probably the most nutrient dense way to prepare it, in my opinion.
Toss your cabbage in a bowl and add the caraway seeds.
Now add the sea salt and whey.
Pound it all with a wooden pounder or a meat hammer for 10 minutes.
Now stick it all in a quart-sized wide-mouthed jar and press it down really well until the juices cover the top. I found that a ladle did the trick for this part.
There should be at least one inch above the cabbage and the top of the jar.
Cover tightly and keep it at room temperature for about 3 days, then store it in the fridge. You’ll notice the flavor improves the longer it’s been stored. I wish more foods were like this…
I first tasted sumac onions at my first visit to a Persian restaurant. Right away, I was hooked and was putting these sour marinated onions on everything, with extra sumac shaken on. Love that stuff! Since then, I have been wanting to create a fermented version for extra nutrients. Serve with just about any Middle Eastern dish!
Peel and thinly slice onions. I use a food processor. Sprinkle sumac over the onions and stir to coat.
Firmly pack the onion mixture into 2 quart sized mason jars and leave an inch of head space.
Mix together a 3.6% brine by adding 2 tbsp unrefined sea salt into 1 quart of non-chlorinated, filtered water. Stir to dissolve.
Pour brine solution over onions. Press onions down so they are under the liquid. At this point you can cover with a cabbage or grape leaf and weigh down with a sterilized rock or fermenting weight. Keep the 1 inch head space. I am using a homemade airlock system, but it’s not necessary. You can just cap them with a canning lid.
Set out of the way on the counter and cover with a cloth to block out light. Leave on counter for 3-7 days before transferring to refrigerator. Watch for signs of fermenting after a couple days. You should see small bubbles trapped on sides. After 3-4 days, smell to see if has the sour fermented smell. Use a clean fork to test a piece. If not to your taste leave out a few days longer. Will keep 6 months in fridge.
Note:Ferments happen slower in cooler weather. Also, if you choose to use a starter, such as whey, only use 1 tbsp of salt in your brine and leave on the counter only 2 days as the starter greatly speeds up the fermenting process.
An amazing way to preserve garlic! The lacto-fermenting process also takes some of the heat out of the garlic, making it pretty easy to eat raw. The benefits of eating raw garlic are astronomical. Garlic is known to have great healing qualities. Use your lacto-fermented garlic in any recipe that calls for fresh garlic. Of course, if you cook it, you will lose probiotics, but the flavor is fantastic.
Place garlic heads on a cookie sheet and put in a warm oven, no more than 200 degrees for about an hour. Alternately, you could place in a dehydrator set at 160 for the same time. This precess helps to loosen the skins from the cloves, making the garlic easier to peel.
Peel the garlic being sure to leave the root end intact. Cutting off the root end of the clove could cause the fermentation process to be uneven.
Fill a clean quart size mason jar with the peeled garlic. Pour in the whey or veggie juice at this time if you will be doing it that way. Dissolve the 2 tablespoons of sea salt in 1 quart of water. Pour over the garlic, leaving at least an inch of head space.
I weigh down the garlic with a cabbage leaf and place a clean rock (that I’ve boiled to sterilize) on top to keep them below the liquid.
Cover with a lid and leave on the counter for 48 hours if using the whey option, otherwise leave on the counter for about 5-7 days. Open up the jar after a few days to see if it is beginning to smell sour to your liking.
Remove cabbage leaf and rock and store in the refrigerator for up to a year. Can be eaten right away, but I like them after they have aged about a month in the refrigerator.
*NOTE: Some garlic pieces may turn blue in this process. Don’t be alarmed. It is a chemical reaction with the copper in some water and is harmless.
An easy and delicious version of Korean Kimchee. This dish will keep indefinitely in your refrigerator after the initial fermentation. All the veggies I use in this dish are organically grown.
Prepare all the vegetables and put them into a very large bowl, crock or food safe bucket, or more than one container if you need to in order to have enough room.
When you add the cabbage, do it in layers, adding the salt as you go.
Pound and mix the vegetables until it is very juicy.
Pack firmly into a gallon-sized glass jar.
Cover with cabbage leaves held down by clean rocks. The vegetables need to be kept below the liquid that rises to protect them from the air and spoilage. You can also use a food storage bag filled with water, and sealed tightly to hold the vegetables down. I would double bag the water, to be safe.
Cover jar. Let sit at room temperature, venting the jar occasionally, for 3 days. Then refrigerate.
When you are ready to eat some, either right away or after a week or two, remove the rocks and cabbage leaves and enjoy! Once it is refrigerated, you needn’t worry about it spoiling and can leave off the cabbage leaves.
This lacto-fermented apple chutney is sweet, spicy, slightly tangy and a perfect compliment to raw cheddar, kefir, yogurt, poultry and more. It’s hard not to eat a whole bowl full of this stuff! Think of all the awesome probiotics you will get eating this lacto-fermented chutney.
Combine the water, lemon juice, salt and whey. Mix the combined liquids with the other ingredients and pack firmly into 2 - quart sized jars or 1 - half-gallon jar, leaving at least 1 inch of headspace at the top. The liquid should come to the top of the fruit. Add a little more water if necessary. (I usually layer apples, cranberries and pecans together in my food processor and let it do all the work.)
Cover and leave at room temperature for 48 hours (alternately, use a lacto-fermentation device that has an airlock system, such as those offered by Cultures for Health. You should see trapped bubbles around the sides, which is a sign of active fermentation.
Refrigerate and leave in the fridge another week before eating. Will keep for about 2 months in the refrigerator. Be sure to always use a clean utensil when dipping out of the jar and re-pack the fruit each time.
Tip: Use this lacto-fermented cranberry apple chutney as a “dressing” on top of shredded cabbage for a probiotic rich salad.
A Korean fermented food, fruit kimchi, is spicy, sweet, and healthy. This recipe is very simple to make for even a beginner fermenter.
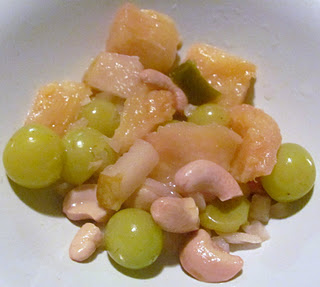
Place all the fruit, vegetables, and nuts into a 1 quart mason jar. I mixed my fruit up well to ensure a good consistent flavoring through the entire jar. Pack the fruit in very tightly.
Add the pineapple juice to the jar to fill in all the gaps between the fruit. The pineapple juice should cover your fruit. The pineapple juice acts as a brine solution. The acidic nature of the pineapple juice will prevent extra scum from growing on top.
Place the lid on the jar and screw on the top. Place the jar in a temperature stable location out of direct sunlight. I left mine on the counter away from the stove.
The next day loosen the top to release the gas build up in the jar. You will see bubbles and hear a distinct spewing sound of the gases being released. The bubbles and gas build up indicate that the fermentation is occurring. Retighten the lid.
Repeat step 4 everyday for a week.
After 1 week open up the jar of the fruit kimchi and remove any scum. I did not have any scum on top, but yours might have scum on top. Enjoy your kimchi!
Store in the leftovers in the refrigerator. This ferment will last a long time in your refrigerator, probably 3 months.
Colorful and tasty and just a bit spicy, this is a kraut sure to please.

Chop/shred cabbage, carrots, green onions, ginger and garlic by hand or with a food processor. Combine all ingredients in a medium size mixing bowl. Cover with a tea towel and leave to sit at room temperature for 1/2 hour while the salt helps pull the juices out of the veggies.
Pound a few times with a potato masher or meat hammer (or kraut pounder) to make sure it is getting juicy. Leave for another 1/2 hour if desired, or proceed.
Transfer ingredients to a clean quart-size, wide mouth jar. Press down firmly so that liquid comes to the top of the mixture. Leave 1” space at the top of the jar. Put on lid and band and screw tightly.
Allow to ferment at room temperature for three to seven days. In the first 24 hours, open the jar and press down firmly on the ingredients a few times to make sure the brine is fully covering the mixture (it will continue to be released over time).
Fermentation may proceed faster at very warm temperatures. Burp jar daily, even keeping the jar on a towel to catch seeping liquids. Skim off any mold or fuzz that develops on top (everything beneath the brine should be fine).
The mixture will be bubbly, and the vegetables will soften. Stop the fermentation when you like the flavor and texture. (We like ours best at 5 to 7 days.) Transfer to the refrigerator or cool storage. Repack carefully each time you serve. Will keep several weeks in the refrigerator.
Serve alongside main dish chicken, turkey, beef, or ham. Serve with eggs for breakfast. Enjoy!
This is one cultured probiotic food that everybody will eat.
Place all ingredients in blender, and blend until smooth. Place in glass jars and seal. Sit on counter for 2 days and then transfer to refrigerator. Will last at least 6 months in refrigerator.
This is one of the first recipes for cultured vegetables my family would eat. If you haven’t had golden beets you are in for a treat. I think they taste like sunshine!
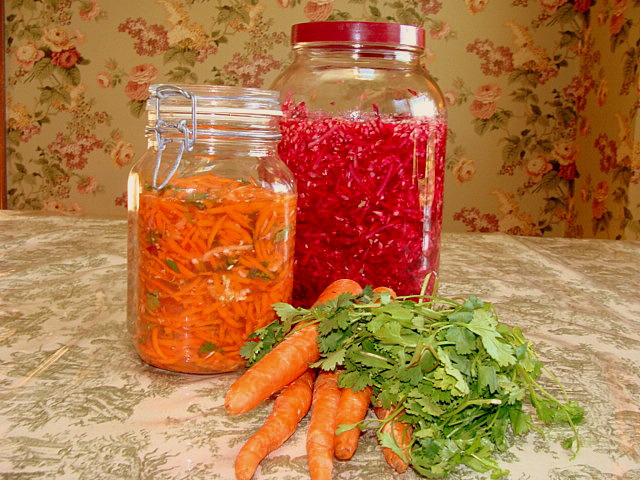
Add culture package to a glass gallon jar according to instructions. ( I just place starter in a cup, feed it about 1 tsp. sugar to wake it up and add 1/2 cup of water. Stir till dissolved. Then let it sit while I chop my vegetables ) Or you can add 1/2 cup of kefir whey instead.
Peel and shred all items and place in jar.
Fill with water and cap jar. Let sit for 6 days on your counter out of the sunlight.
Place in refrigerator. They will ferment in the fridge too and taste even better. Cultured veggies last at least 9 months or longer in your fridge.
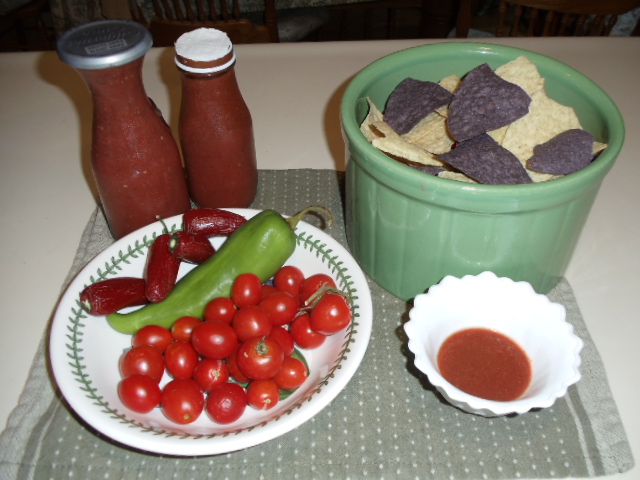
Lacto fermented pickles that snap when you bite them! If you have a cold or flu try a pickle or drink the juice. The good bacterias fight all kinds of viruses.
 Chop cucumbers in half place flat side down on surface and cut into spears. Place cucumbers in 4- 1 quart jars.
Place other ingredients in a bowl with a spout for easy pouring.
Mix all ingredients till well combined. Pour mixture into jars making sure that each jar gets equal amounts of ingredients. (some of the seed fall to the bottom)
Fill the jars with extra water leaving an 1 1/2 inches of room at the top and making sure veggies are below the water. The veggies will mold if left above the water. If this happens scrape off the mold or discard veggies and push the others below the water. The mold is harmless and won’t hurt anything but they can ruin the taste of the veggies.
Set at room temperature for 3 days and then place in the refrigerator. They taste they best after 3 to 4 weeks in the refrigerator.
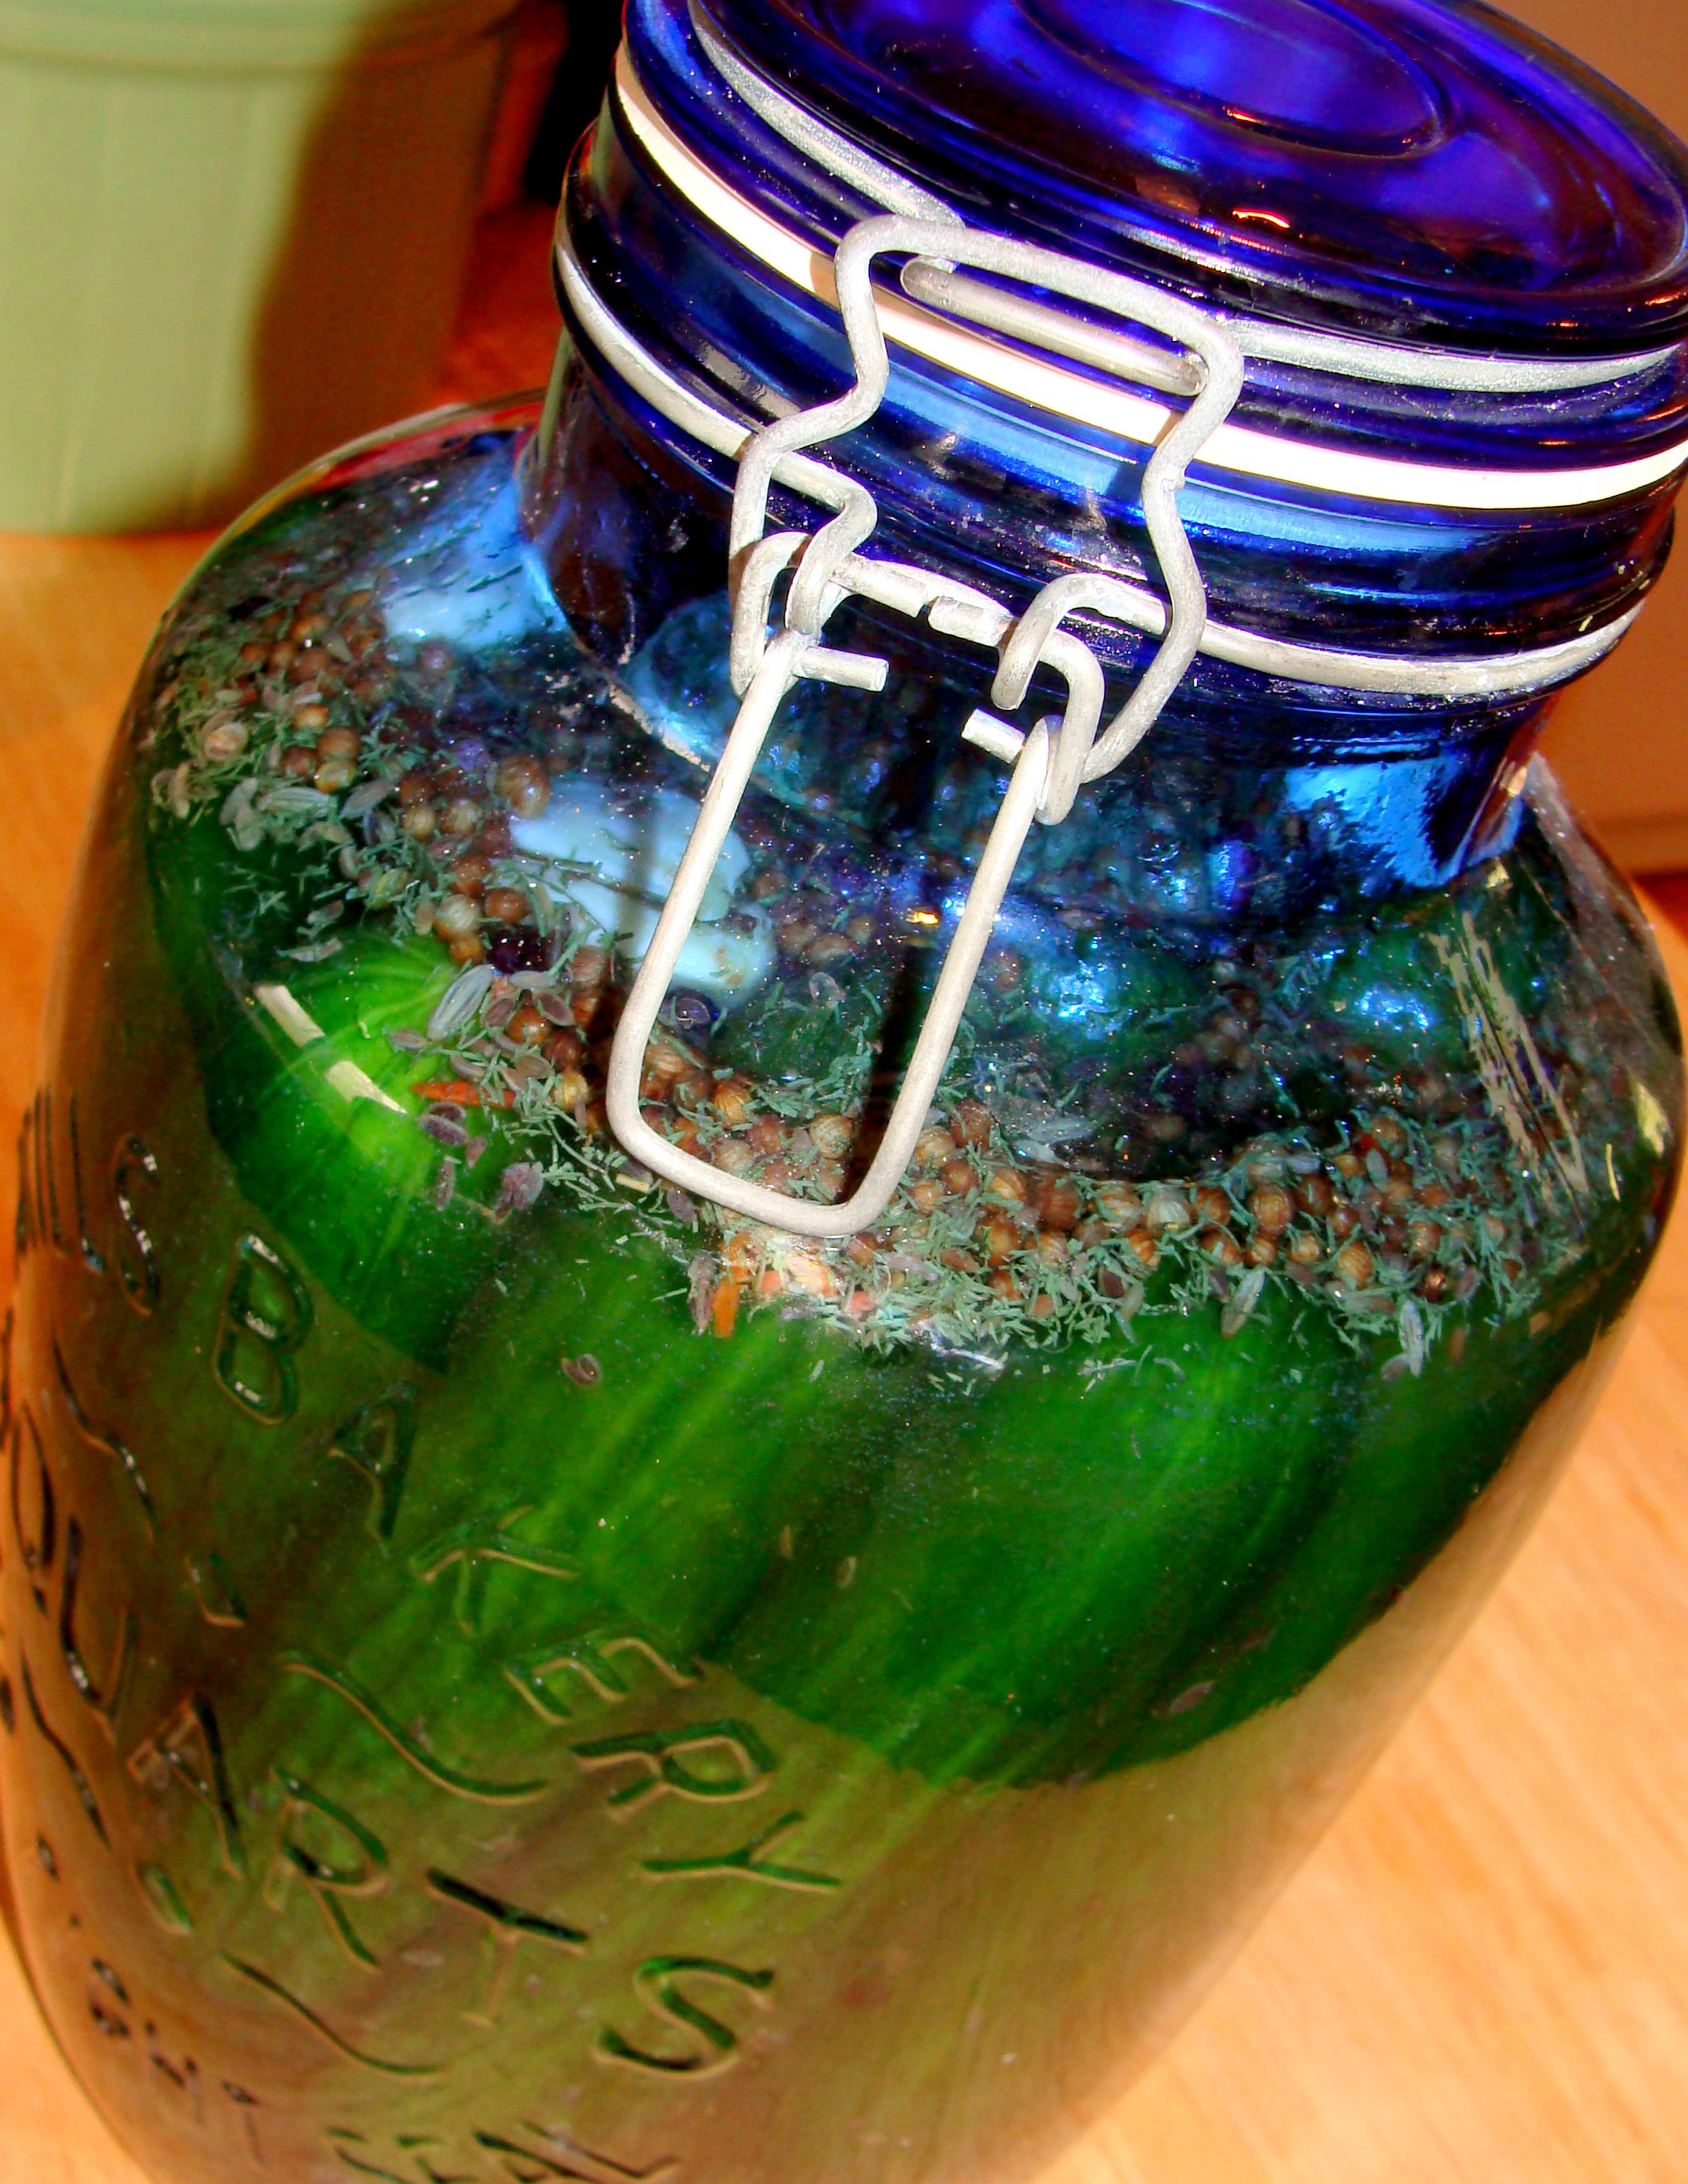
Unique pickles that have a hint a rosemary and a lovely lemon flavor. These are the kind of foods that are perfect for cold and flu season. A few tbsp of juice or couple slices of these pickles can help knock out a virus and also help super charge your immune system.
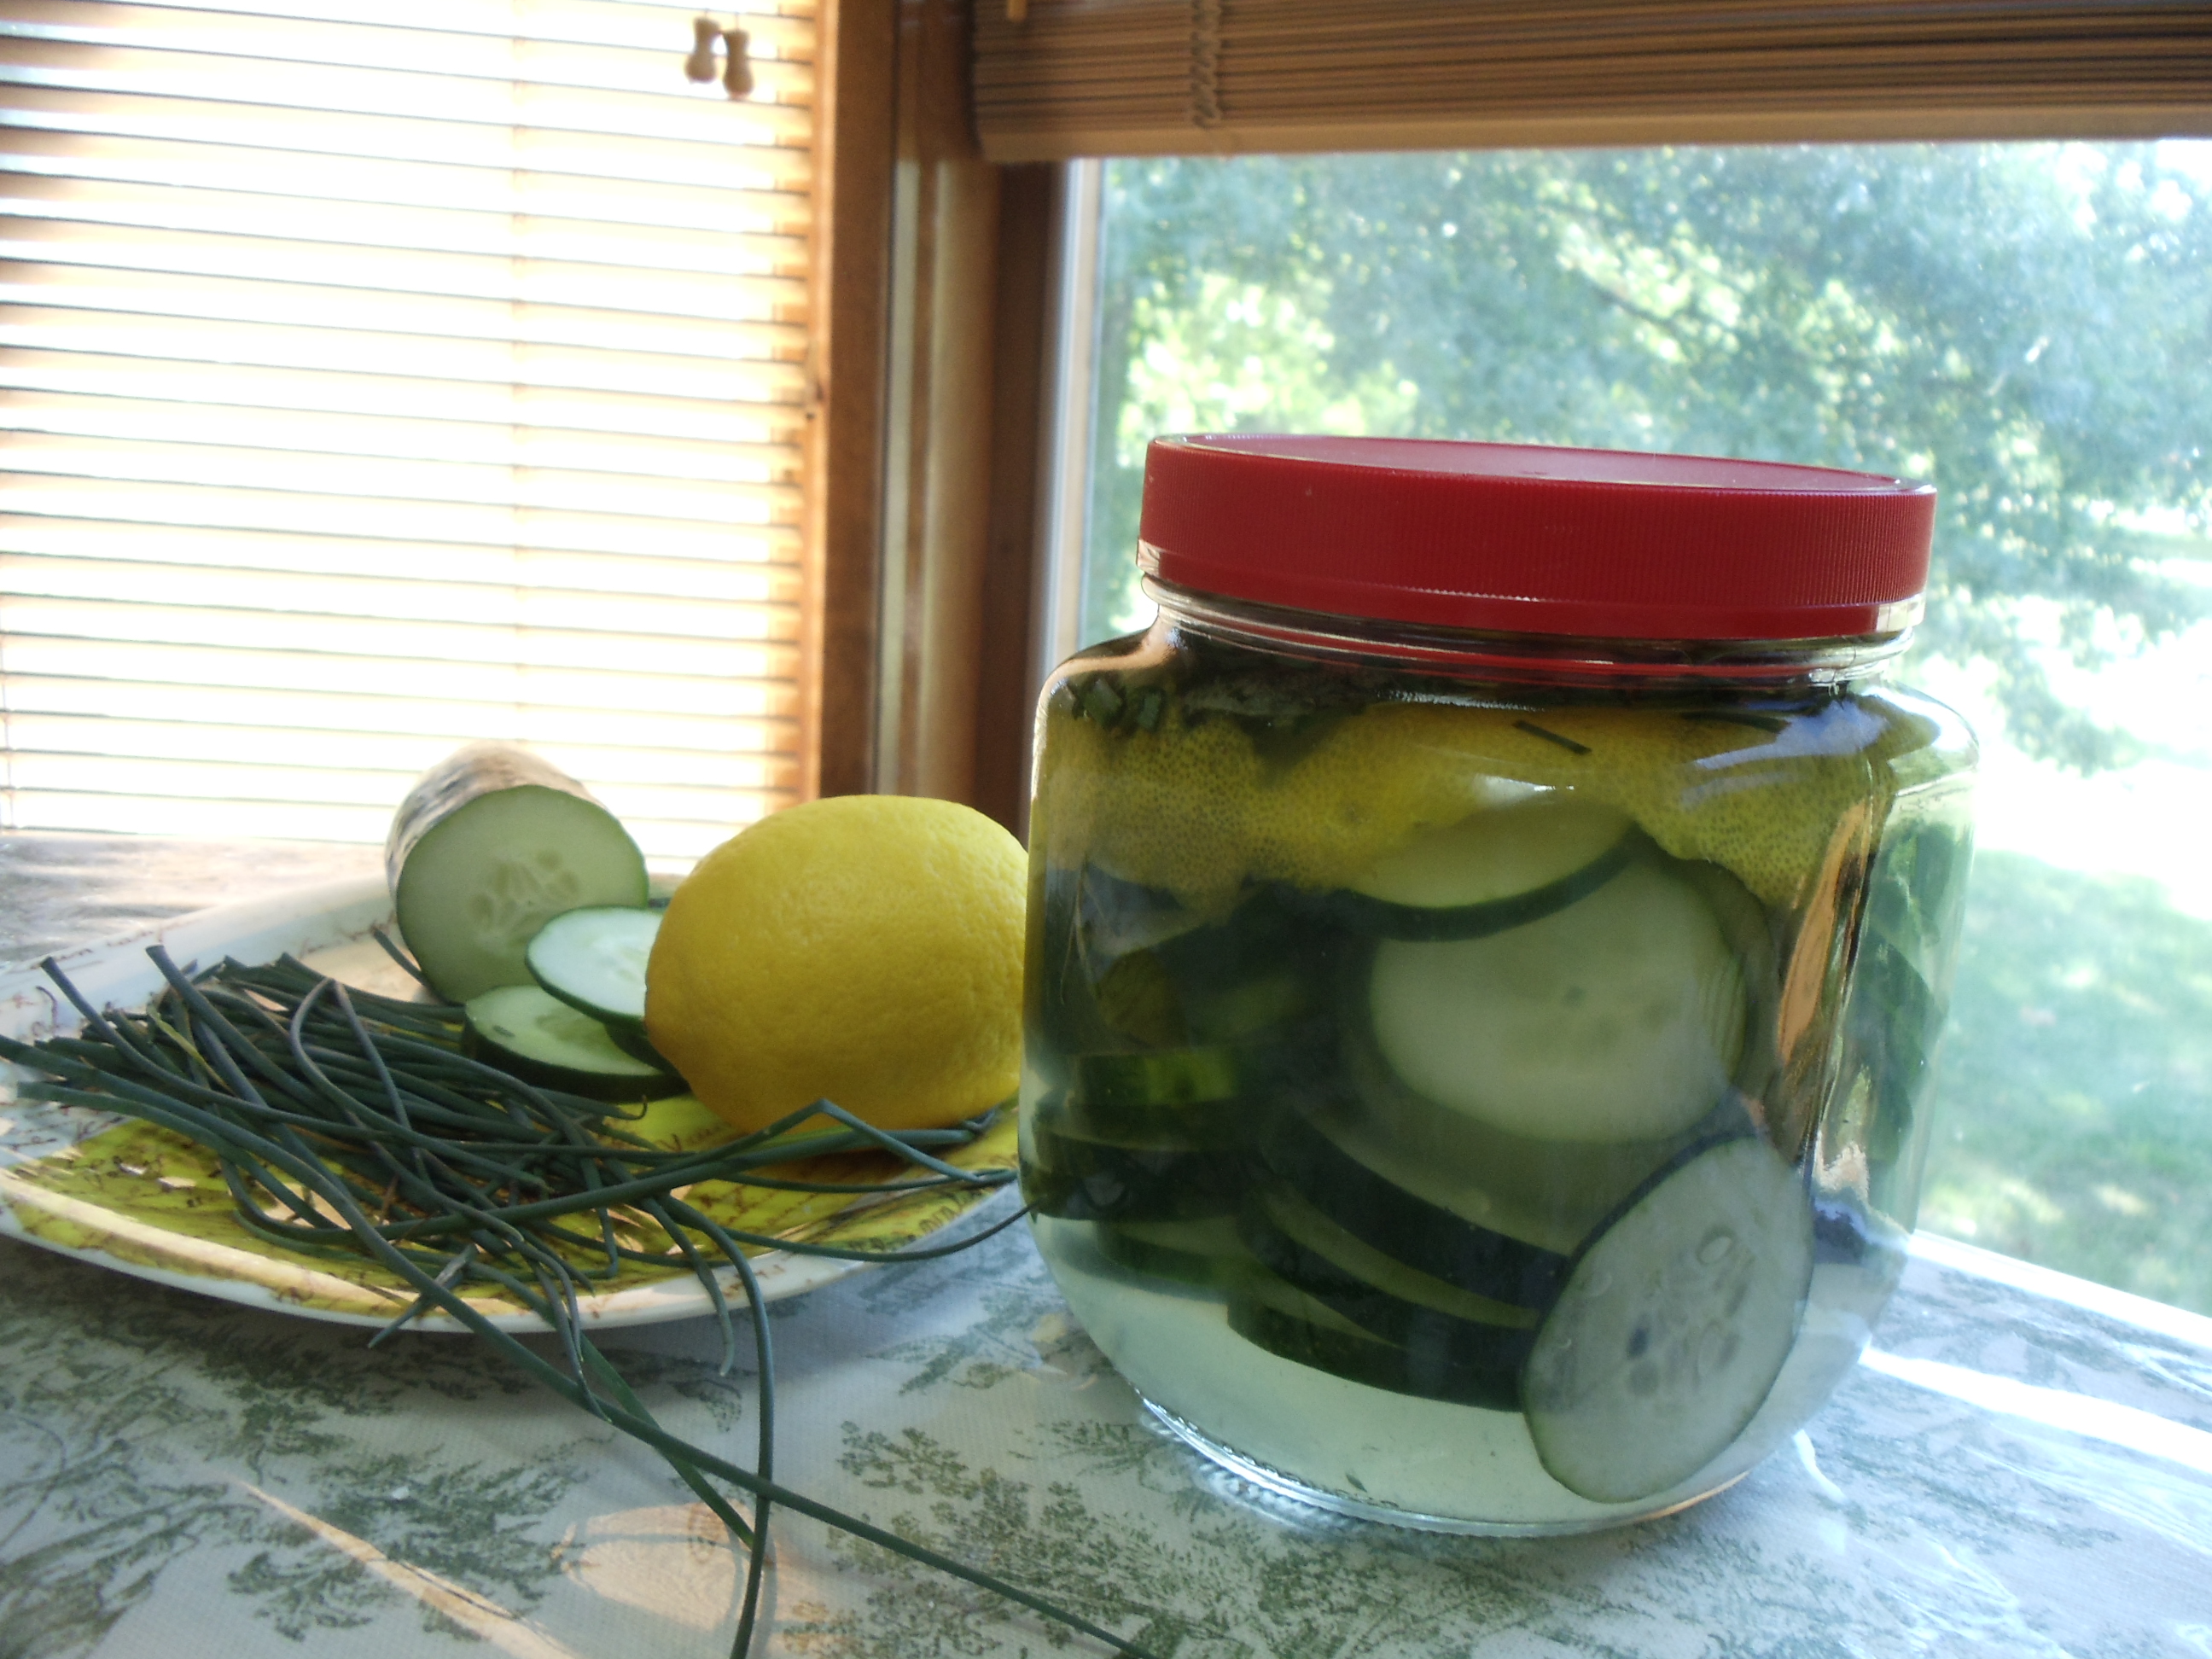
Slice cucumber into ¼-inch rounds.
Tightly pack sliced cucumber and herbs in a 16-ounce clean glass jar until about ¾ full.
Add cultures and extra water. Leave an inch or two of room at the top of the jar. The pickles will ferment bubbly and expand.
Let sit on counter tightly capped for 3 days and then place in refrigerator to further culture. They are ready to eat after about a week but keep fermenting and age much like a fine wine.
I like them the best at about 2 to 3 weeks.