This is so simple and with only one needed ingredient (no starter cultures needed, although some cream and salt and pepper would make it even better), and only a little time, I’m not sure this can really be a recipe. But once you make it you will never want store bought cottage cheese again. At the end of the week we normally have anywhere from 1/2 to a 1/4 of a gallon of our raw milk left, I use this milk to make the cottage cheese, everyone in the family looks forward to it.
Please visit the blog link to see step by step pictures of the process if you need them.
Take your milk and pour it into a glass bowl, cover with a tea towel and let sit until the milk has thickened. This should take about a day to two days depending on the temperature of the room and how old your milk is. You can remove the cream from the top, or leave it there and when the milk is ready you can spoon the cream off the top and have sour cream.
The milk should look like yogurt when it is ready. When you put a finger in the milk it should hold the cut. Another way to know if it is thick enough is to place the back of a spoon on the edge of the bowl and press down on the curd lightly. If it pulls away from the side of the bowl without filling the spoon it is ready. But you don’t want it to sit so long that the whey starts to separate from the curd. When it is ready, pour the milk into a sauce pan and set to low.
With the milk on low, stir gently, don’t worry about keeping the curd in one piece it will not stay together and it will need to break apart at some point. Keep it on low, stirring often until the curd releases the whey. This shouldn’t take too long and you will want to keep an eye on it, it should take 5-10 minutes. You will know when this happens because the curd will sink to the bottom and the whey will be on top. When you start the cooking the milk, the whey will start to separate, but as it keeps cooking whey will rise to the top and you will see a definite difference in the look of it.
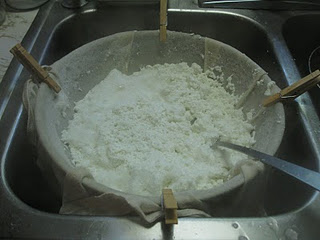
Once the curds and whey have separated line a bowl with a tea towel or a few pieces of cheese cloth. Pour the curds and whey into the lined bowl and then hang the towel. I put the towel under my stack of dishes. It is not recommended to hang it on your cupboard doors as this can cause the doors to start hanging crooked.
Let this hang until the whey has all dripped out. This can take a while if you just want to let it be, or you can rush it along by squeezing the bag. I find that giving the cloth a few squishes when the whey starts to slow down helps speed up the process also. I let it drip until it drips every couple seconds. This could take 5-15 minutes (if you squish the bag), to an hour or longer if you just let it be.
When the whey has been dripped out the curd is solid but not absolutely dry. You should still feel moisture on the curd. Once the whey has been dripped out, crumble the curd into a bowl, if you are going to eat it right away, or a container to store it in for later.
You can leave it how it is and eat it without cream, or use it in lasagna. Or you can add the cream and salt and pepper to taste. I use about a half a cup of cream per half gallon of milk used, but add how much you like.
A couple extra notes: You can save the cream from the milk you use to put on the cottage cheese when done, or use fresh cream. Because the whey has been heated it does not work well for soaking grains, but you can use it in bread, compost, or for watering the garden.
*It MUST be raw milk, pasteurized milk does not contain the needed enzymes and bacteria, and you will only get sour, spoiled milk. I like to use milk that is about a week old as I find that it gives the best flavor in a reasonable time.
If you brew milk kefir on a regular basis, you will probably end up with extra kefir. When you have more than you can use, here is an easy way to make kefir “cheese.” It is a great replacement for sour cream and cream cheese.
You will need either a cotton or linen bag, or cloth to drain the kefir.
Pour the milk kefir into the bag and suspend it over a bowl to catch the whey that will drip out.
If you don’t have a bag, use a cotton or linen cloth and tie up the ends with a piece of string or a rubber band.
Let the kefir drain for a full 48 hours, then transfer the kefir to a glass container with a tight lid.
Store in the refrigerator.
Save the whey that drains out in a glass jar with a lid in the refrigerator. This live whey is very handy when soaking grains or legumes or starting lacto-fermented veggies.
Once a week, stir the cheese and it will keep fresh for many months.
Quark is a type of fresh cheese. It has a very smooth and creamy texture and is slightly sweet (unlike sour cream or yogurt). It is used in baking (cheesecake), cooking (Pierogi), as a dip with herbs, or most popularly as a dessert with fresh fruits or berries - mmh, yummy. If you do not know what I am talking about, you most likely have not had any quark yet, otherwise you would remember this unique and very delicious taste.
Even though quark is very popular in Europe, it is hard to find in the US or Canada. The good news is that it is very easy to make.
General Information
Quark is a cultured milk product. If you have access to real milk that thickens on its own, you do not need the buttermilk starter. Go to step 2 and proceed with the Junket. Most of us however don’t have access to real milk; all we have is pasteurized store bought milk and cultured buttermilk. Out of those two: milk and cultured buttermilk, we can make quark. To save money I make my own buttermilk first, and make quark out of it. For the very first batch, you can skip step one altogether and go to ‘Making Quark’. Just use the HINT to make more buttermilk.
Making Cultured Buttermilk
Combine about 4 cups of milk with about 1/3 cup of cultured buttermilk in a glass jar. Mix well and cover loosely. Leave about one inch room at the top. It tends to rise while thickening. Place in a warm place. In the winter a kitchen cabinet that has a heating shaft underneath is perfect. You can also use a dehydrator or an oven with the lights on. After a few hour - up to to a day (depending on the temperature) the milk will thicken and turn into cultured buttermilk. Now you can take some out as a starter for the next batch of cultured buttermilk. HINT: Whenever you empty a buttermilk package, just refill it with milk, shake it, and place in a warm place and you will have buttermilk again. Cultured buttermilk is great as a cool healthy drink, for baking, and for making quark.
Making Quark
If you use a very warm kitchen cabinet, or a dehydrator for the first step, you can go to step two without even checking it. After a few more hours the buttermilk will thicken and separate itself from the whey. This is again depending on the temperature, warmer will go faster. If after 24 hours you only have buttermilk then your place is to cold. Use the oven, setting it to the lowest heat you have. Do not overheat! In the oven, buttermilk can turn into quark in two hours. Watch it until you see it separate.
Now fill the quark into a cheesecloth and put it in to a colander or hang it till all the whey has drained out. There you have it, homemade quark!
There are several ways to make mascarpone cheese. Commercially a sort of quick mascarpone is made by using tartaric acid to separate the curds from the whey, but this results in a grainy texture and, more importantly, no active cultures! Some recipes call for a mixture of cream and whole milk and then draining the whey to get a thicker curd, but I am going to share the absolute easiest way to make mascarpone cheese that can even be made with raw milk.
Mascarpone should be silky smooth, thick and rich with a slight tang. It’s super simple to make your very own and you can use it to top pancakes, waffles, dip fruit in, or make your own authentic tiramisu or cannolis.
Place cream into a quart sized mason jar. Add the kefir. Cover loosely and allow to sit at room temperature for 24 hours. After this time you should have a thick curd that should not need straining. If it’s too runny, feel free to drain some whey out.
If you used a lighter fat content cream (or half cream and half milk), you may want to strain your curd in some cheese cloth for a few hours to let some whey drain out.
Refrigerate and enjoy! This will keep for a few weeks. 🙂
NOTE: You can also make this by using creme fraiche in place of the kefir if you have it, but I really like the flavor of the kefir mascarpone and think it makes a thicker cheese.
Last week I had an American woman, who labores in the Ukraine, staying with us while she’s on her year-long stay in the U.S. I really don’t know how we ended up talking about yogurt, but she said they make yogurt in a large pot all the time and she could teach me.
We started out with less than a half gallon of raw milk, and these are the instructions that gave us creamy, thick yogurt. There was no need to sweeten or strain it.
Scald milk in a pot to about about 175° F, stirring consistently. You’ll notice a film come to the top of the milk.
Cool milk to 110° F or until placing the inside of your wrist on the pot just slightly bites, but no longer burns. To speed this step, place pot in a sink full of cold or ice water.
While the milk is cooling, fill a large pot about 1/3 with water and start heating to about 110° F.
Once the milk has cooled to 110° F, stir in one packet of yogurt culture or 1/2 cup of whole fat, plain yogurt.
Pour the cultured milk into quart glass jars, with lids loosely screwed on. Then place the quart jars in the large cooking pot that is 1/3 full of water.
Fill the pot with more water or take out water so that the water line is nearly even with the cultured milk line in the quart jars.
Wrap the large pot in blankets and put near a heater or a warm place in your house and let sit for 6 to 12 hours or until yogurt is thick. Check the temperature every few hours; you may need to add more hot water once or twice.
We’re making cultured butter and buttermilk here, this is serious stuff. Seriously simple. Seriously. Why would you want cultured butter over regular butter? Cultured butter has good bacteria. You know, probiotics? Good for your gut? Supports immune system? Trims tummy fat? Yeah, that kinda bacteria. The good kind.
If you are fortunate enough to have access to raw milk or cream like I am, congratulations! All the needed enzymes and bacteria are still in place and you need nothing but good ol’ raw cream and a jar with a lid to make cultured butter.
If you don’t have access to raw cream, I am so very sorry. You will need one pint of cream (No additives. Pure, glorious cream. Check the label) and three tablespoons kefir, yogurt, or cultured buttermilk. Not vanilla kefir or yogurt. Pure, plain kefir or yogurt. And a jar with a lid. OR… If you happen to have some creme fraiche looking for a purpose, skip the pasteurized cream and kefir and just use it (and begin at step two, below).
Store raw cream, or pasteurized cream with kefir or yogurt mixed in (see above for amounts) in a very clean glass jar with the lid screwed on well at room temperature. If it’s raw, it only needs to sit overnight (or 12 hours if it’s winter). If it’s pasteurized (I’m sorry again), keep it sitting out for 12-24 hours, depending on how warm room temperature is (less time for warm, more time for cool). Once it starts looking thicker (swish it around a bit to test it’s thickness), it’s butter time.
You can either churn your cultured cream with an electric mixer (if you own a Kitchen-Aid, use the whisk attachment) or a food processor. The food processor seems to take less time, the mixer takes several minutes. The problem I sometimes have with the food processor (mine is eleven years old, so the newer ones might work better), is that it sometimes leaks the precious cream, and that’s just painful for me. Crank the chosen appliance on. Once you start seeing lumps, you have butter! And buttermilk! Ah, buttermilk! It’s all starting to make sense…
Drain the buttermilk into a bowl. Now use a spoon to squeeze any more buttermilk out of the butter and into the buttermilk bowl.
Rinse the butter with cold water and push out the water with a spoon like you did to get the buttermilk out. Continue doing this (rinse and squeeze) until the water that you squeeze out of the butter is clear. If you don’t do this and there’s still buttermilk in your butter, the butter goes rancid. Rancid butter tastes nasty. Rancid = free-radicals. Free-radicals bad. Squish the butter into a glass storage container and pour buttermilk into a glass jar (remember the picture way up at the top? Yep.)
And there you have it, folks! Cultured butter for the cultured foodie. No need to salt it; it’s flavor is perfect by itself. How long will they keep, you ask? It depends on how fresh your cream was. The butter and buttermilk will keep for a few weeks in the fridge if your cream was fresh. Now go! Make some cultured butter! Your tummy will thank you.
Don’t let it scare you. Creme Fraiche (pronounced crem fresh) is basically healthy sour cream. But much fancier. And you can feel extra fancy knowing it is a key ingredient in fine French cooking. It is simpler than simple to make it.
First, pour a little bit of cream in your quart-sized jar.
Now, pour in all the buttermilk.
And the rest of the cream.
Stir it up.
And put a lid on it, already.
Now, just enjoy watching your cream lacto-ferment while you sit by the fire. Or set it someplace warm, like next to the oven for 20-24 hours. If it’s winter, it’ll take longer to thicken. When it’s hot out, it’s ready a lot faster. Then, store it in the fridge and voila! La creme! You made creme fraiche. The amount of thickness is up to you. You can determine the thickness by how long you let it sit out. If you like it somewhat runny, keep it out for about 20 hours. If you like sour cream consistency, keep it out the full 24 (or less if you’re experiencing a sizzling summer in the valley).
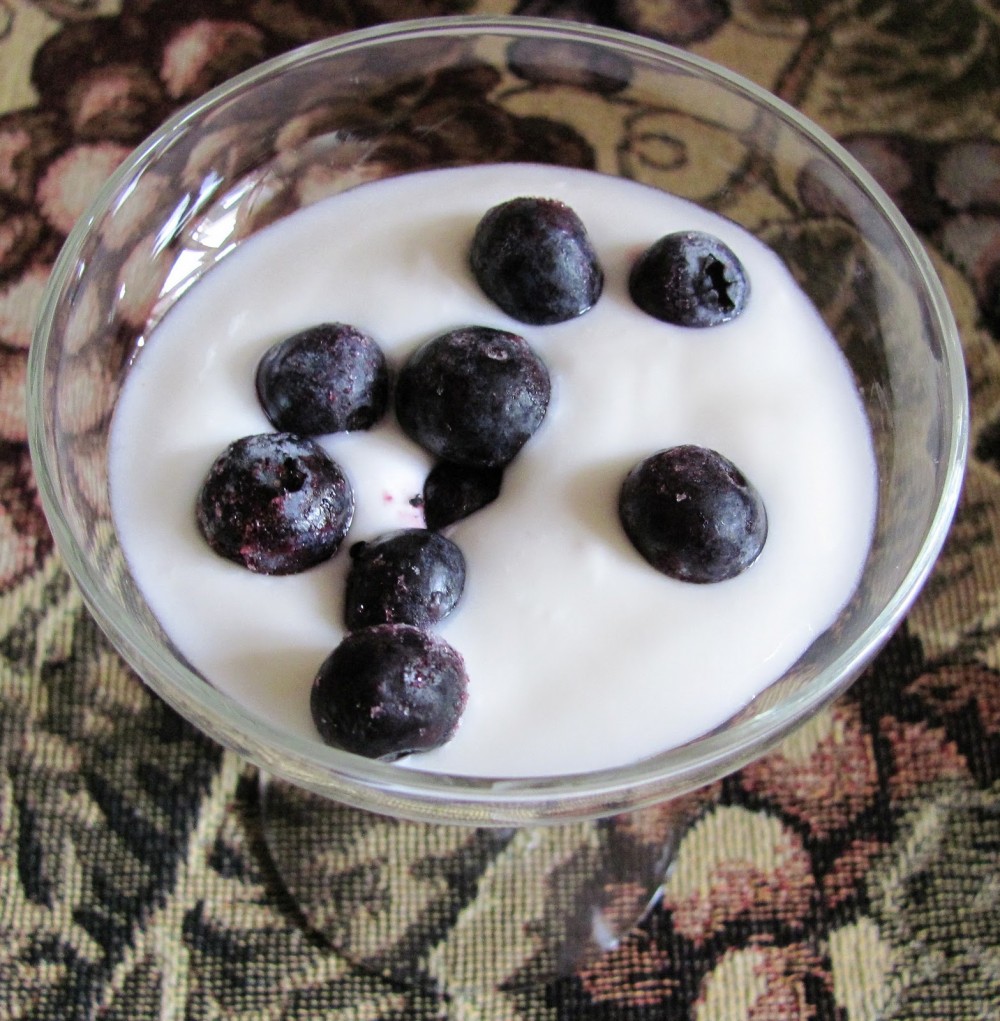
This is the BEST yogurt we’ve ever had. My husband loves it, and he’s not that easy to please. 🙂 I enjoy it plain, but my favorite way is with a little real maple syrup drizzled on top.
Pour 2 quarts (1/2 gallon) raw milk into your 3.5 - 4 quart Crockpot.
Put on the lid, plug it in, turn it on low and set the timer for 2 1/2 hours (2.5 hours.)
Turn off and unplug the Crockpot and let it sit undisturbed for 3 more hours. Then, measure out 1/2 cup plain yogurt (with live cultures) and mix it into 2 cups of the warm milk.
Pour the milk with the yogurt back into the Crockpot, mix well and put on the lid. Then wrap the whole thing up with a couple of big fuzzy towels or a nice warm blanket and let it sit for another 8 hours. Longer (if you are doing it overnight) will not hurt (up to a point!)
Pour it into a container (I use a half-gallon jar) put on the lid and refrigerate.
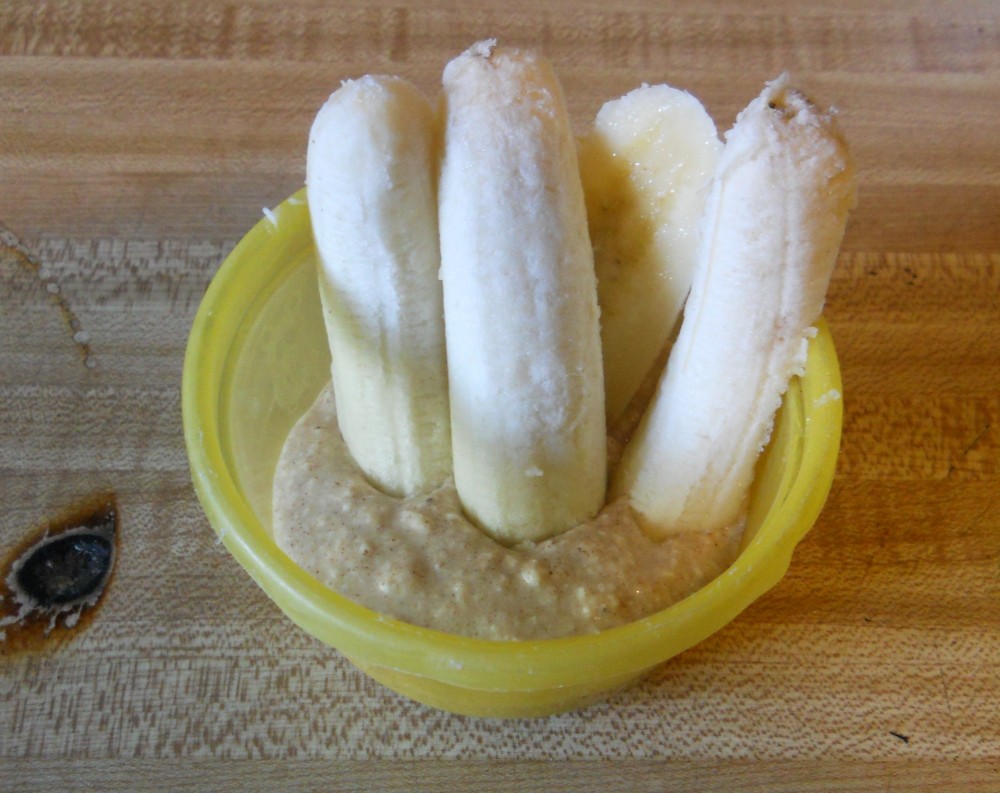
This is a quick and easy fruit dip that adds extra calcium and probiotics to a simple fruit snack. Fun for the kids to eat and even make. Don’t have fruit? Just eat it as is.

Grab all your ingredients
Put ingredients in bowl
Mix
Serve
Here is a straight-forward method for making a simple raw cheddar cheese from our own raw goat milk! Please don’t be afraid. After you’ve tried this a time or two, it will be easy. 🙂 You could use raw cow’s milk if that’s what you have.

Pour milk into large heavy-bottomed stainless steel pot that will give you a little room for stirring.
Heat milk gently to 90 degrees F. Remove from heat.
Mix the mesophyllic starter into a little bit of cool water and then stir it well into the milk. Put on the lid and let the milk sit for 45 minutes.
Mix the rennet into 1/4 cup cool water. Bring the milk back up to 90 degrees F. and remove from heat again. Stir the diluted rennet into the milk for a few minutes. Put the lid back on and let it sit for 30 more minutes, or until when you insert your finger in the milk you get a “clean break” when you pull it out.
Cut the curd with a long sharp knife into 1/4 inch cubes. Stir gently with your hand, cutting the larger pieces into smaller pieces for 15 minutes.
Heat the curds to 100 degrees F, increasing the temperature no more than two degrees every 5 minutes. This should take about half an hour or so. Stir gently, with your hand, often, to keep the curds from clumping together.
Place the pan in a sink full of 100 degree F. water, covered, and let it sit for another 30 minutes, stirring it with your hand several times.
Drain off and save the whey. Pour the curds into a large colander lined with some good quality cheese cloth - not the cheap stuff you buy at a fabric store. I buy mine online.
Put the curds into a large bowl and gently, but thoroughly stir in the 2 Tablespoons sea salt.
Line your cheese press with cheese cloth and put the salted curds in there. Fold the cheese cloth over the top, add the follower and press for 10 minutes at 15 pounds pressure. Invert the cheese press container and press from the other end at 30 pounds of pressure for another 10 minutes.
Remove from press, “dress” the cheese with fresh cheese cloth cut to fit - which will be two little round pieces for the ends and 1 long strip to go around the cheese. Alternately, you can use a large square of the reusable cheesecloth shown on my blog. Return to press at 50 pounds of pressure until the next morning.
Take the cheese out of the press and carefully remove the cheesecloth dressing. Trim off any bits that are sticking out along an edge at the top or bottom of your cheese wheel.
Let the cheese dry in the refrigerator. Let it dry there, on a dish towel, for about 3 days, until it is good and dry. Be sure to turn it over at least a couple of times a day as it dries.
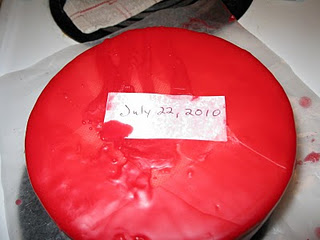
Dip it, twice, in melted cheese wax, return it to the fridge to age for 1 to 2 months, turning it occasionally. I do not have a proper cheese aging room, and the fridge seems to work just fine.
Delicious and versatile Ricotta can be used in many recipes, but the way I make it, it can also be sliced and used in sandwiches, etc.

Pour milk into heavy bottomed kettle. Bring slowly up to almost boiling (at least 200 degrees F)
Add 1/2 cup vinegar. Remove from heat. Stir briefly. Let rest for 15 minutes.
Pour into colander lined with a cotton cloth. Gather up the corners of the cloth, and using a large spoon, press the whey from the cheese curds.
Turn the curds into a bowl and work in 1 teaspoon salt.
While it is still hot, I press the ricotta into a bowl,cover with plastic wrap and chill in the refrigerator.
When cold, it can be sliced or crumbled to use.
Wrap carefully to freeze. It keeps nicely for several months.
The most difficult part about making yogurt is keeping the temperature of the ferment stable and warm for a long enough period of time for the bacteria to do thier work. Using a crockpot as your fermentation vessle will make holding the temperature steady easier without the need for a yogurt maker.

Heat the milk to 185⁰F in a double boiler or in a heat proof bowl that snugly fits on top of pot of simmering water.
Remove the milk from the heat and let it cool to 105⁰-122⁰F. Placing your culture in milk that is too hot will kill the culture and milk that is too cool will not allow the reaction to occur.
Stir in the culture and place the yogurt into a glass container that has a tight fitting lid (I use pyrex dishes but I know others who use baby food jars). For store bought yogurt or homemade yogurt add ½ cup yogurt per 1 gallon of milk. If you are using cultures purchased from a cheese making supplier then follow the package instructions.
Set your jars in bottom of a slow cooker and fill with water and set it to “warm” setting. Be sure to keep a close eye on the temperature of the water.
Incubate the yogurt for 6-8 hours.
The trick is to keep the temperature of your yogurt between 98⁰ and 130⁰F. I have tried the crockpot method written above, but my “warm” setting was too hot. My solution was to turn the crockpot on low for 15 minutes. Then I turn the crockpot off and wrap in a towel and place it in a warm oven (preheated the oven to the lowest setting then turned it off and let it cool for 10 minutes before placing the yogurt in the oven). This method seems to give me the best results. You will have to play with the settings in your own home to come up with a solution that works best for you.
To stop the reaction, place your yogurt in the refrigerator. You can now flavor your yogurt with anything that you want. I like to add fruit and honey or fruit and maple syrup to mine.


